An item with clean finishing is far more appealing than an unfinished one. A visually appealing project will have smooth yarns join, loose ends won’t be visible.
Since not all projects are one ball or one skein projects, you would need to join yarns in the projects, either of the same color or in combination. There are number of the methods to join a new yarn with clean finishing. This post will be all about these range of techniques. While there are some rules for some of these methods, Which method needs to be used for which type of yarn and project is personal choice. However, learning and practicing these methods will come handy anytime.
Before we start with techniques – there are few tips which would be helpful here. For single color or stripes, it is always advised to join the yarn either at the beginning of the new row or end of the previous row unless a multi color projects demands otherwise. In a multi color project, leave the last stitch of color A unfinished and use color B to finish the stitch .
There are 8 methods of joining a yarn. Depending on the color and stitch you are working upon, you can chose any of the various methods.
-
Regular
-
Using slip knot
-
Tapestry join
-
Russian Join
-
Magic knot
-
Invisible knot
-
Spit splicing
-
Yarn braiding – Single color yarn join
-
No knot join
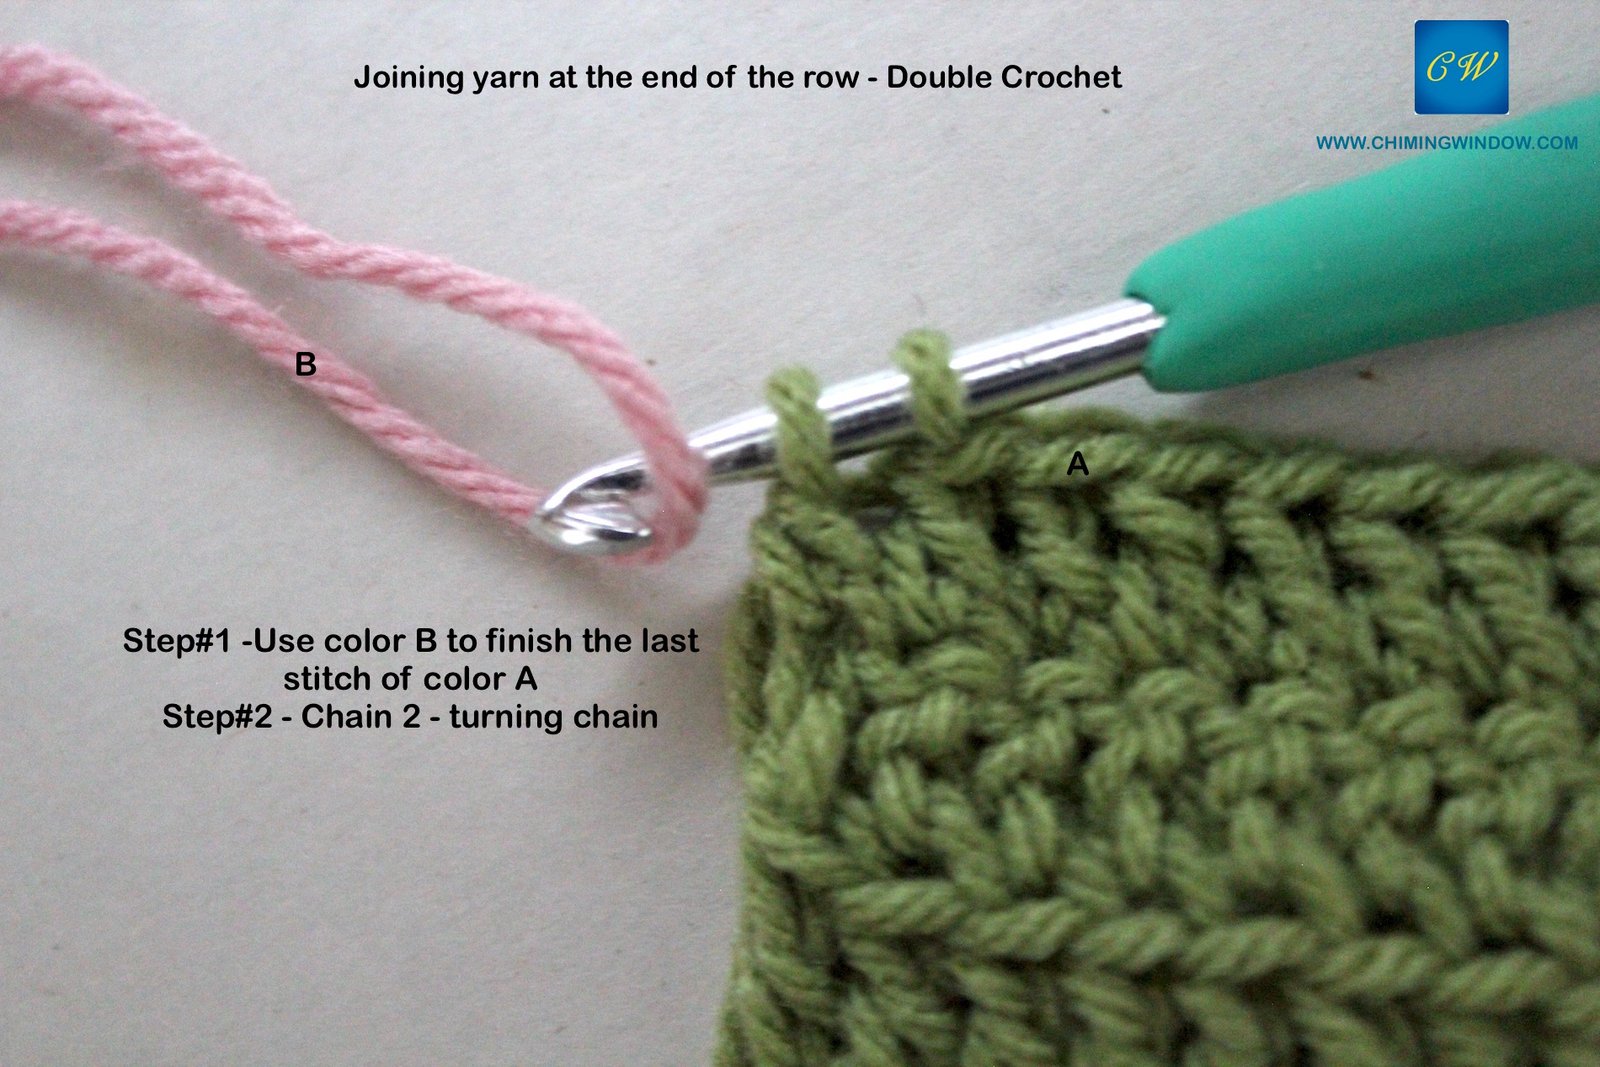
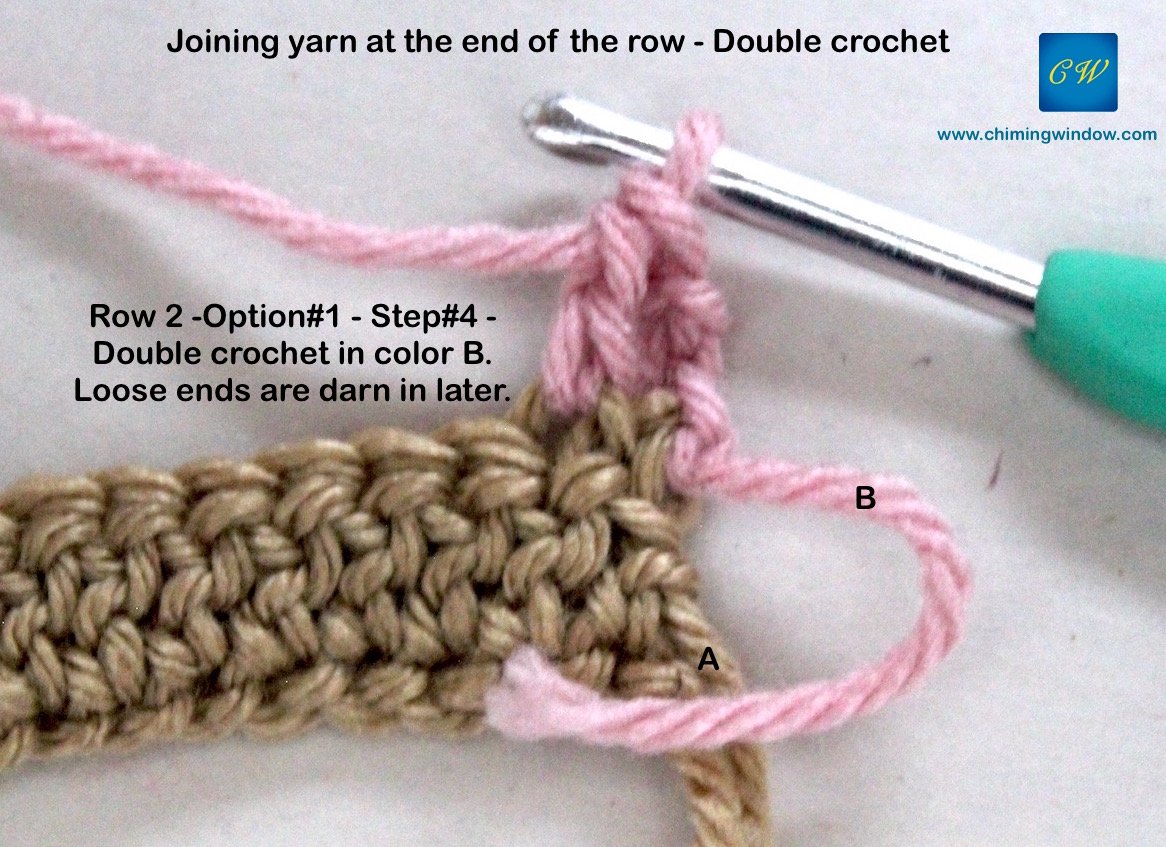
1. REGULAR – In this method, a new yarn is added to the project either in the beginning of a new row or end of the previous row. Suitable for both solid and stripe patterns.
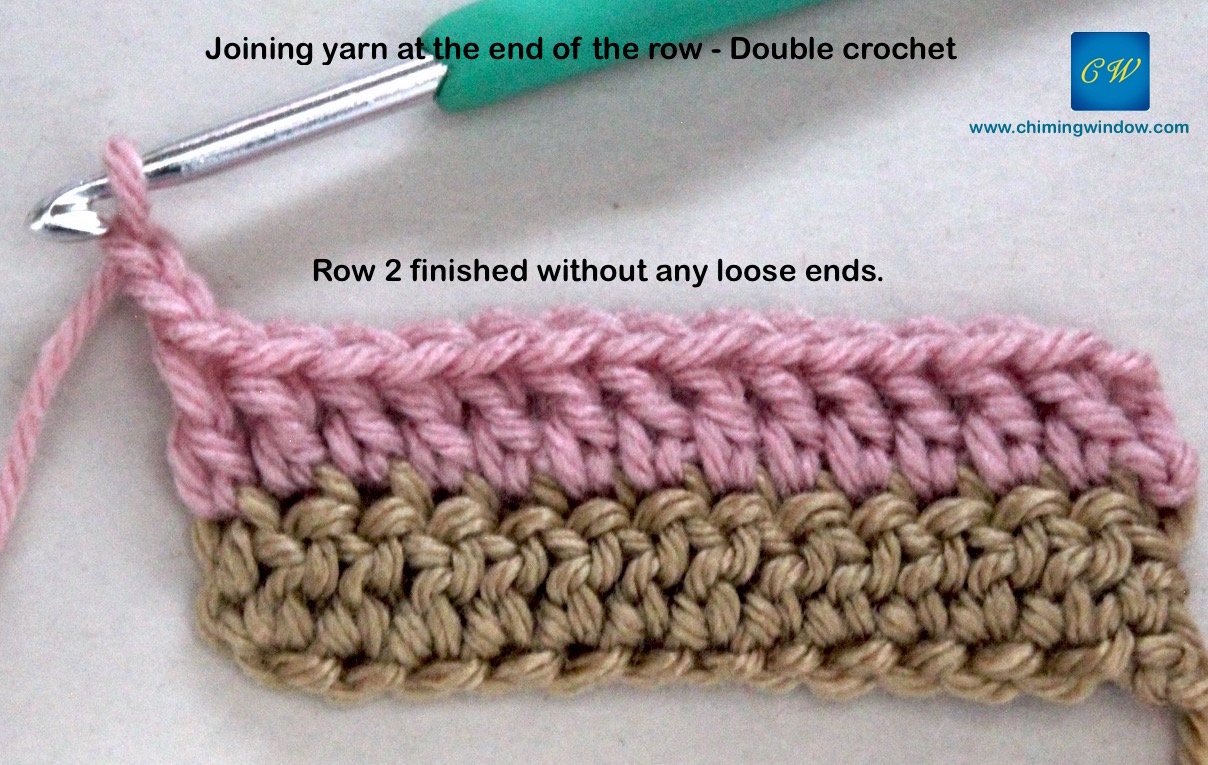
At the end of the row, last stitch is finished with the new yarn. Chain 2 (turning chain) and continue with the stitch in row 2. Below images with DC stitch pattern will help in understanding the steps better.
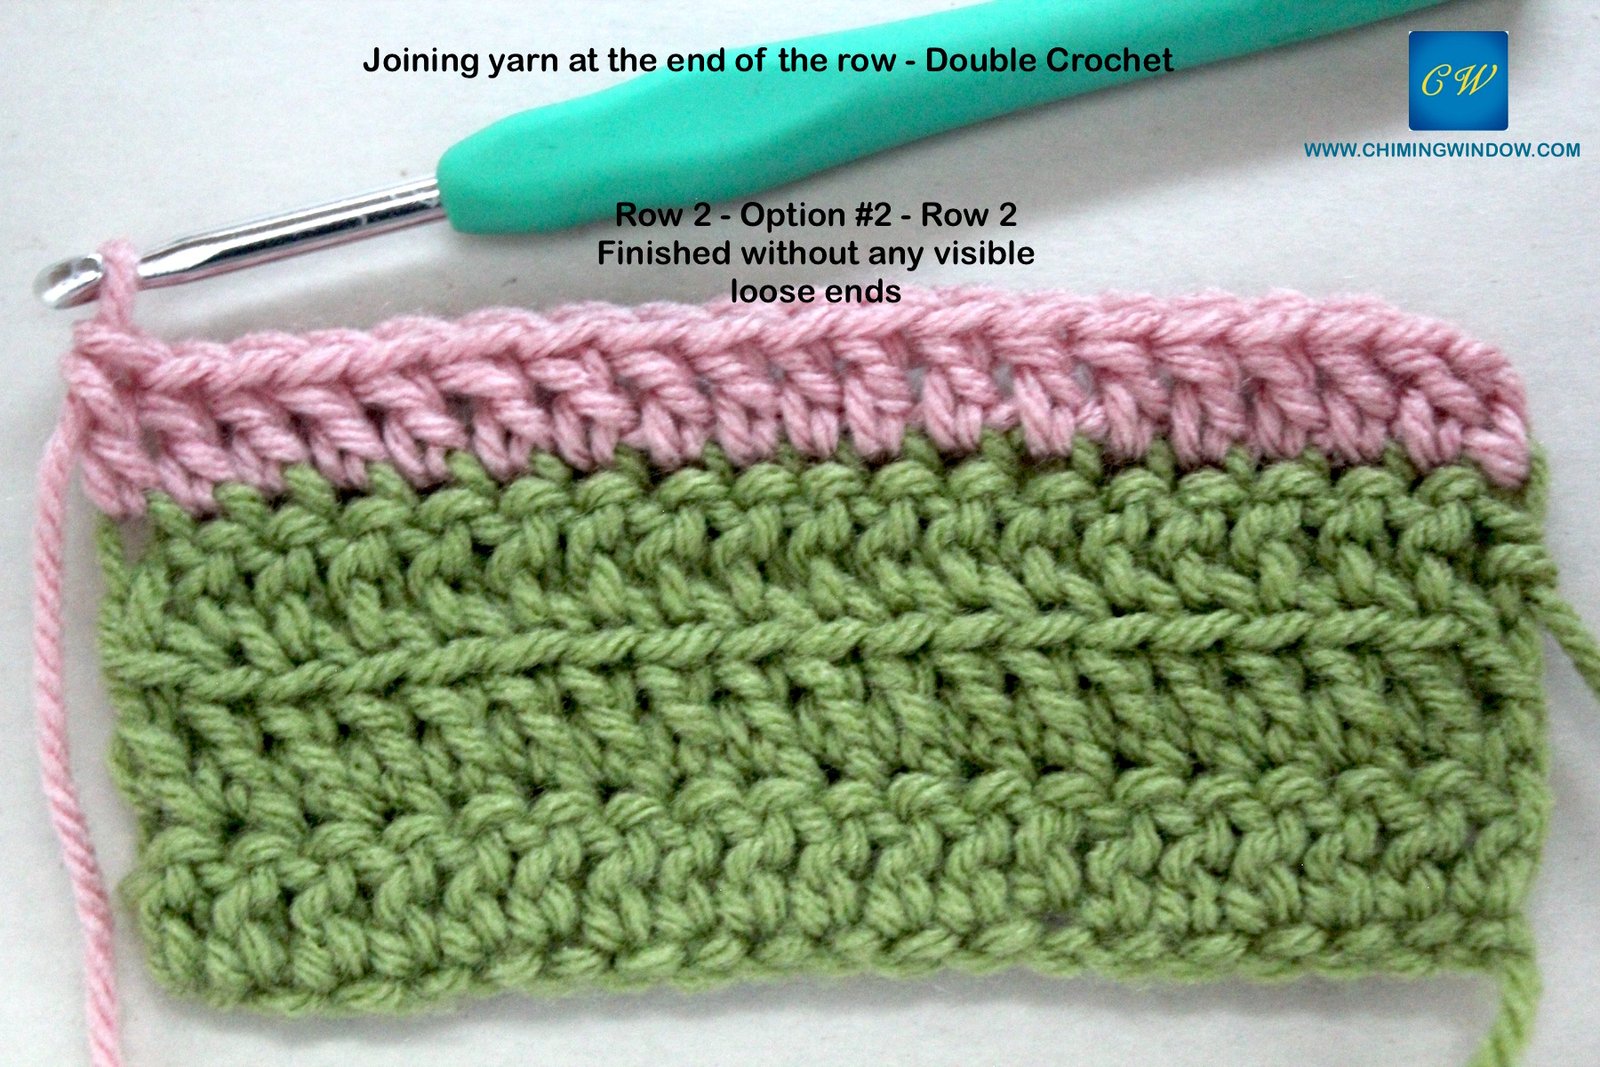
There are 2 ways to finish the loose ends here – Option#1 Darn in later after finishing the project. Option#2 crochet over the loose end to finish it simultaneously. Both have been visually explained in the following images.


At the beginning of the row, yarn is added after fastening off the previous row in the old color. 
New yarn is added, turning chain is made and row 2 is continued in the desired stitch. 
To finish the loose ends, either of the options can be used. Option#1 – Finished the loose ends later. Option#2 – DC over the loose ends to finish simultaneously. 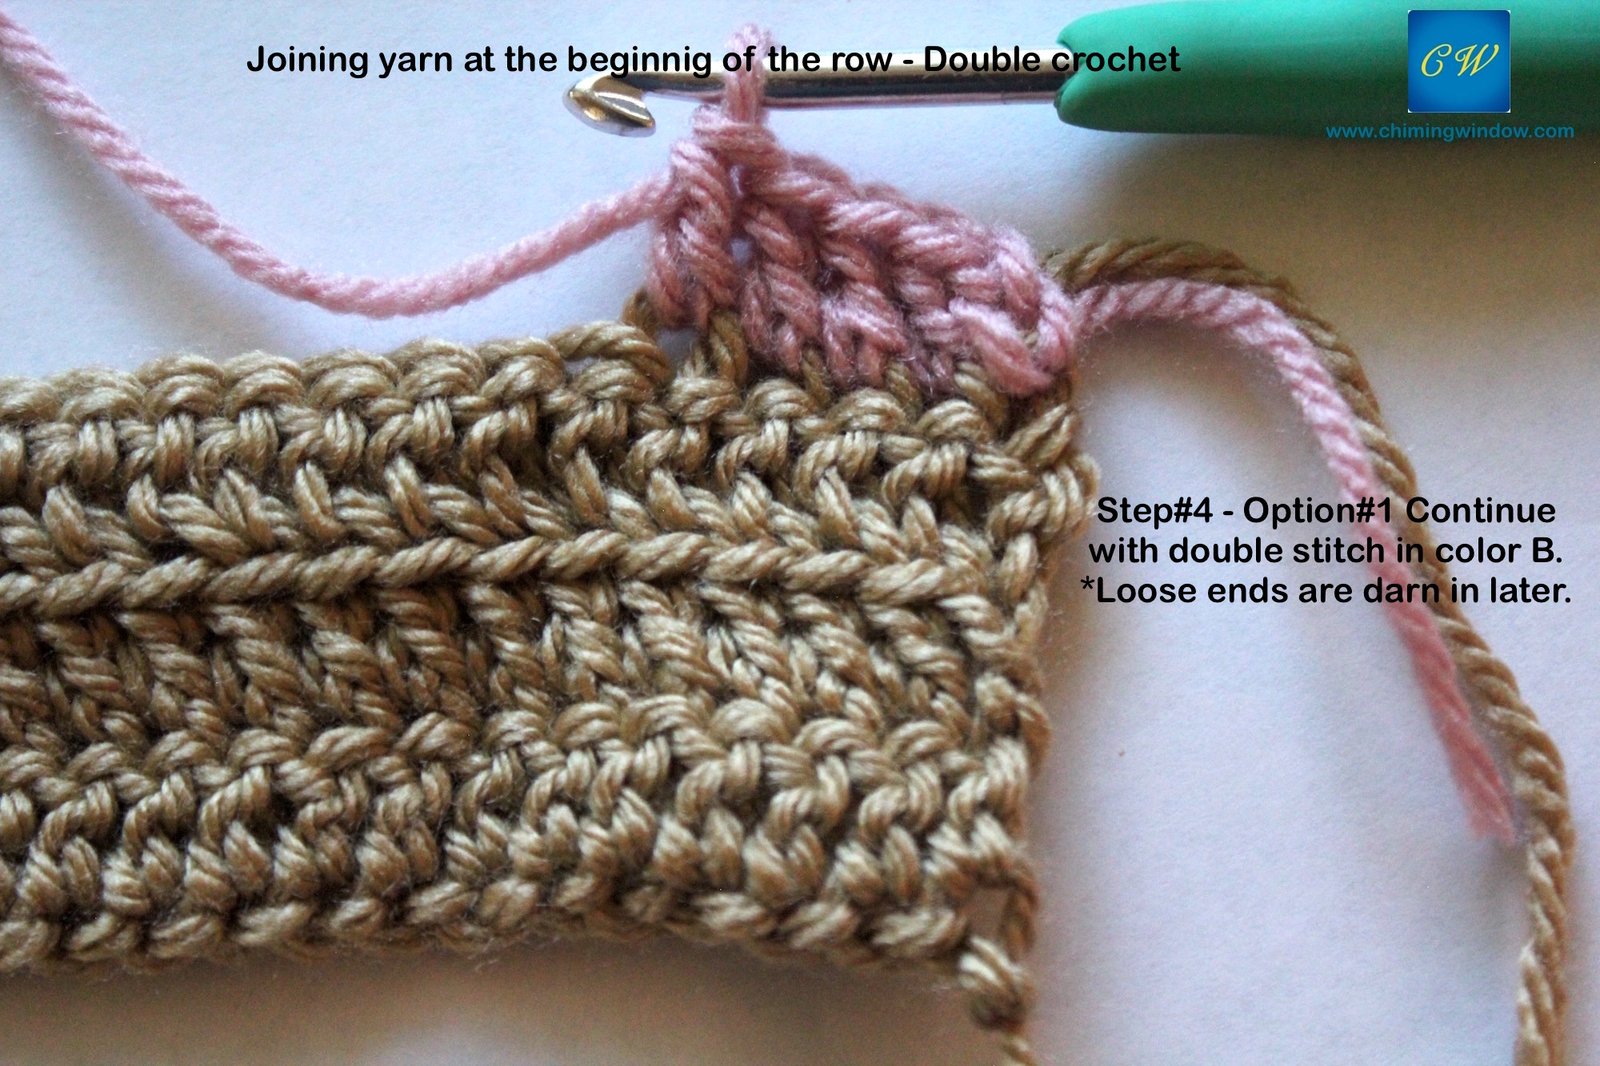

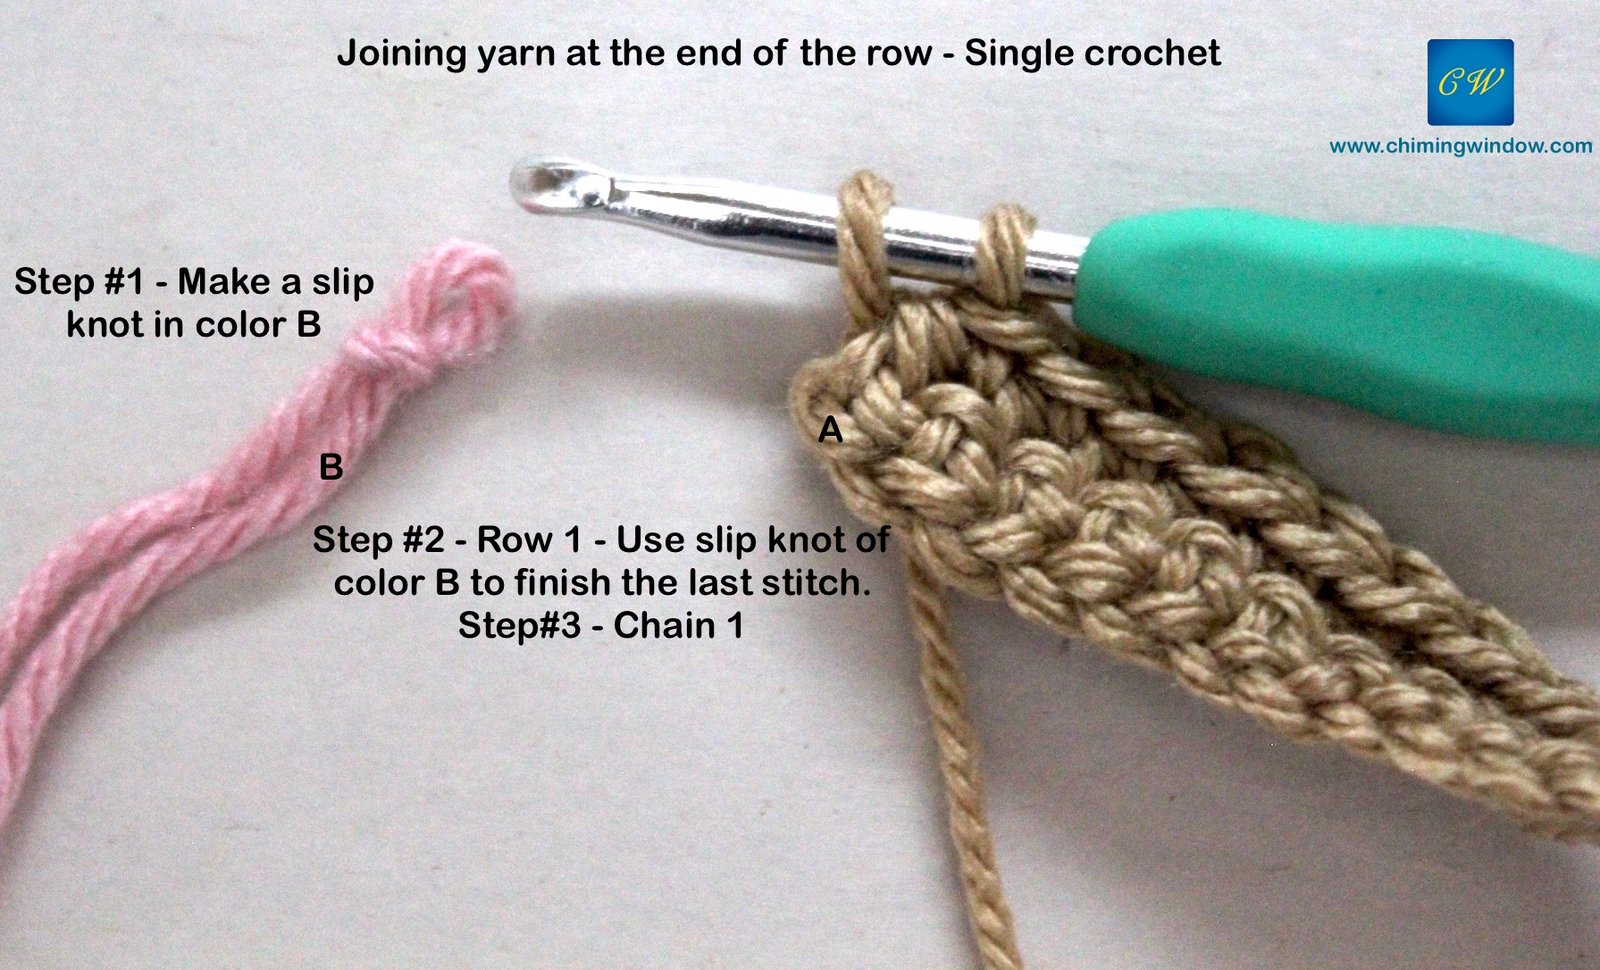
2. USING SLIP KNOT – In this method, last stitch is finished with slip knot in new yarn.
A slip knot is made in the new yarn and added in the first stitch of the row. This method is suitable for both solid and stripe patterns. Following images in SC stitch pattern explains the stepwise process.
Here again, loose ends could be finished either later or simultaneously, as explained above. 

For comparison between 2 stitches – SC & DC, this method has also been explained in DC stitches pattern. 

At the beginning of the row, yarn is added after fastening off the previous row in the old color. Follow the images for stepwise process. 
Once again, loose ends could be finished either later or simultaneously, as explained above. 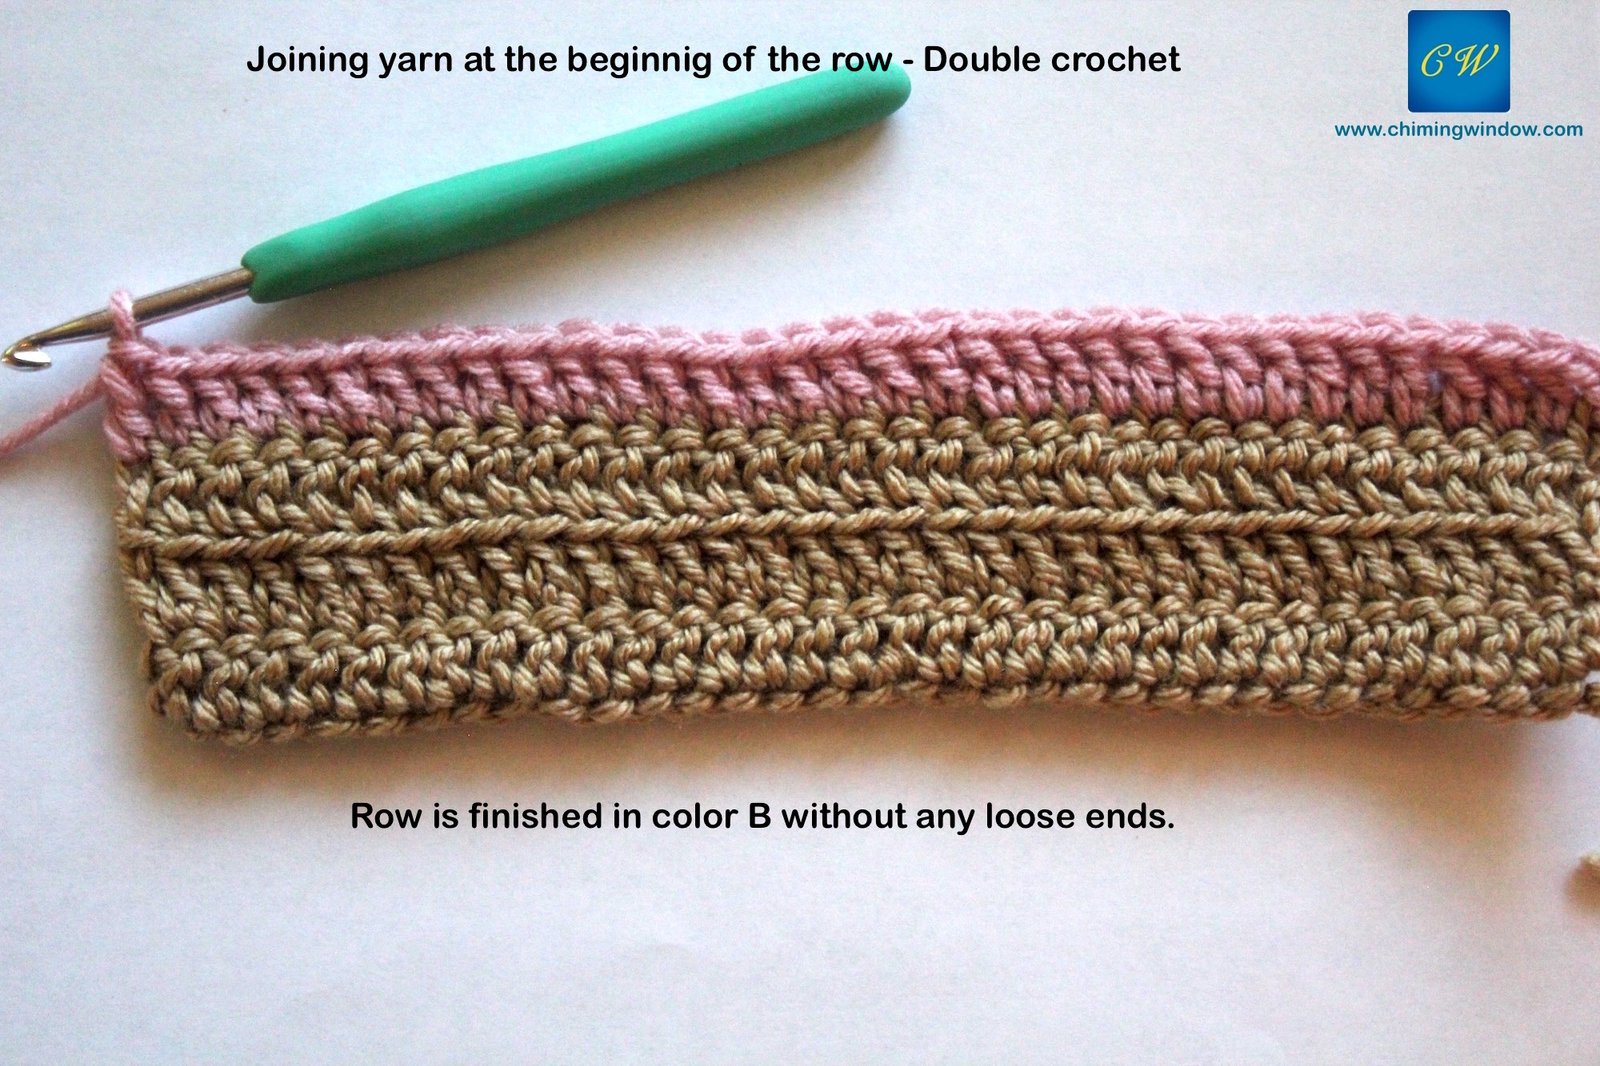
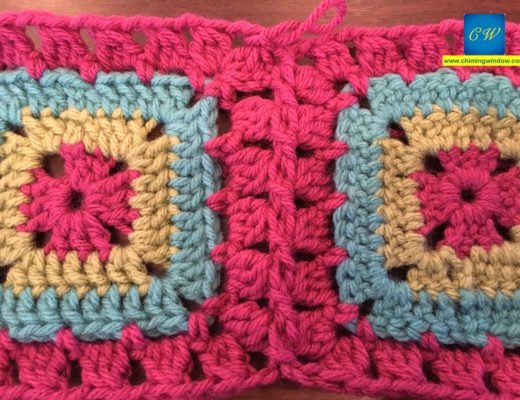
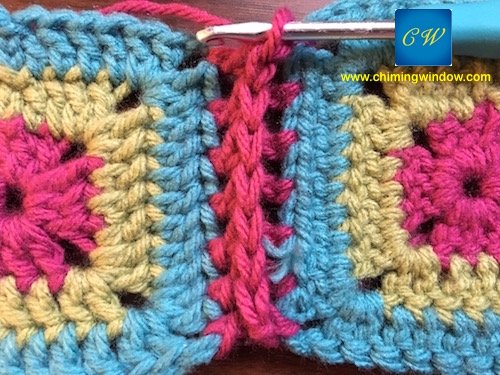
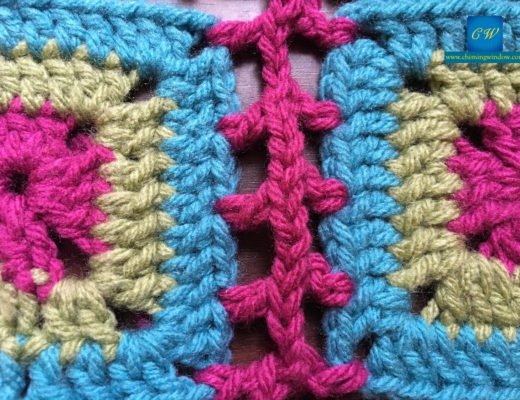
3. TAPESTRY JOIN – This method can be used in single color or multicolored patterns. New yarn is added 4-5 stitches before the point of joining new yarn in the pattern. It goes underneath 4-5 stitches of the old yarn. Refer below images for stepwise instructions.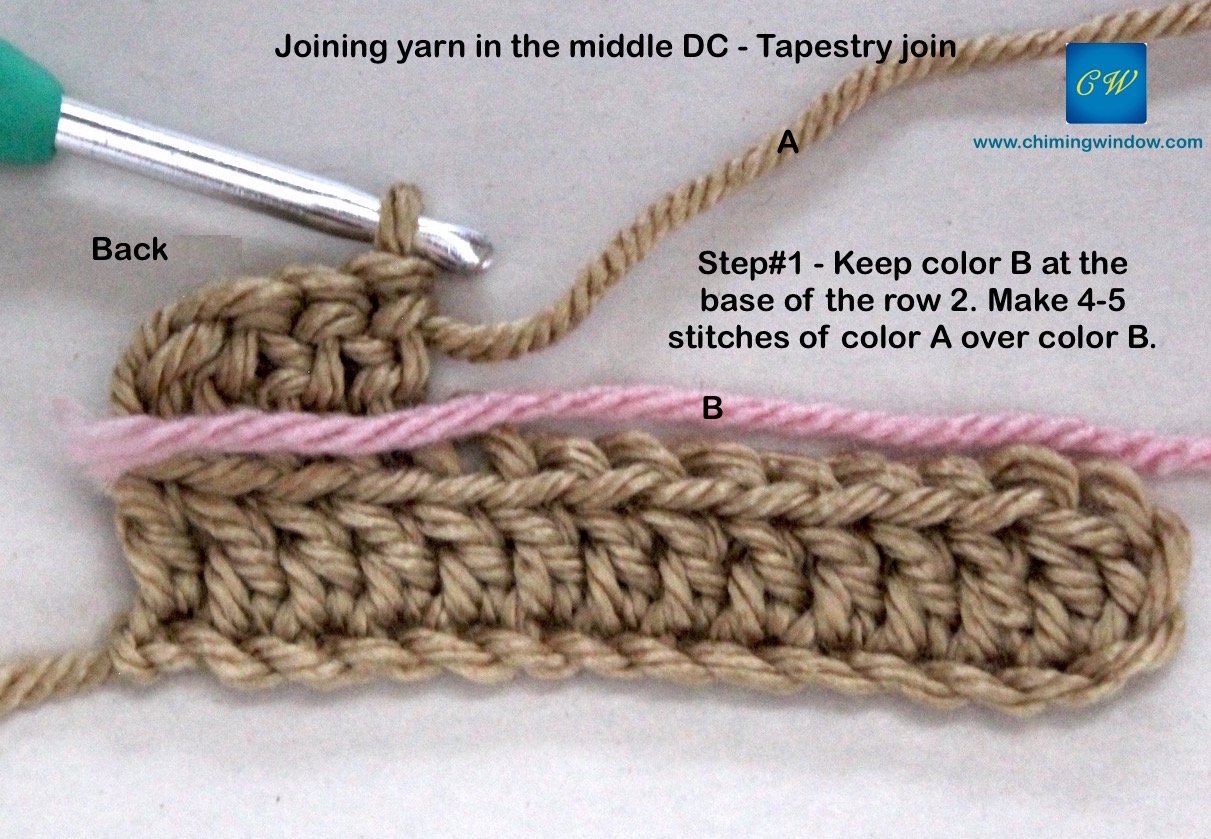
Take the old yarn underneath 4-5 stitches of new yarn. When worked in the same color, the join would be completely invisible. Finishing of the loose ends can be done later.


4. RUSSIAN JOIN – This is a good option to join yarns with high twist. This can be used pretty much for same or contrast color yarns. Thread the needle with one strand of yarn leaving 5″ of tail. 
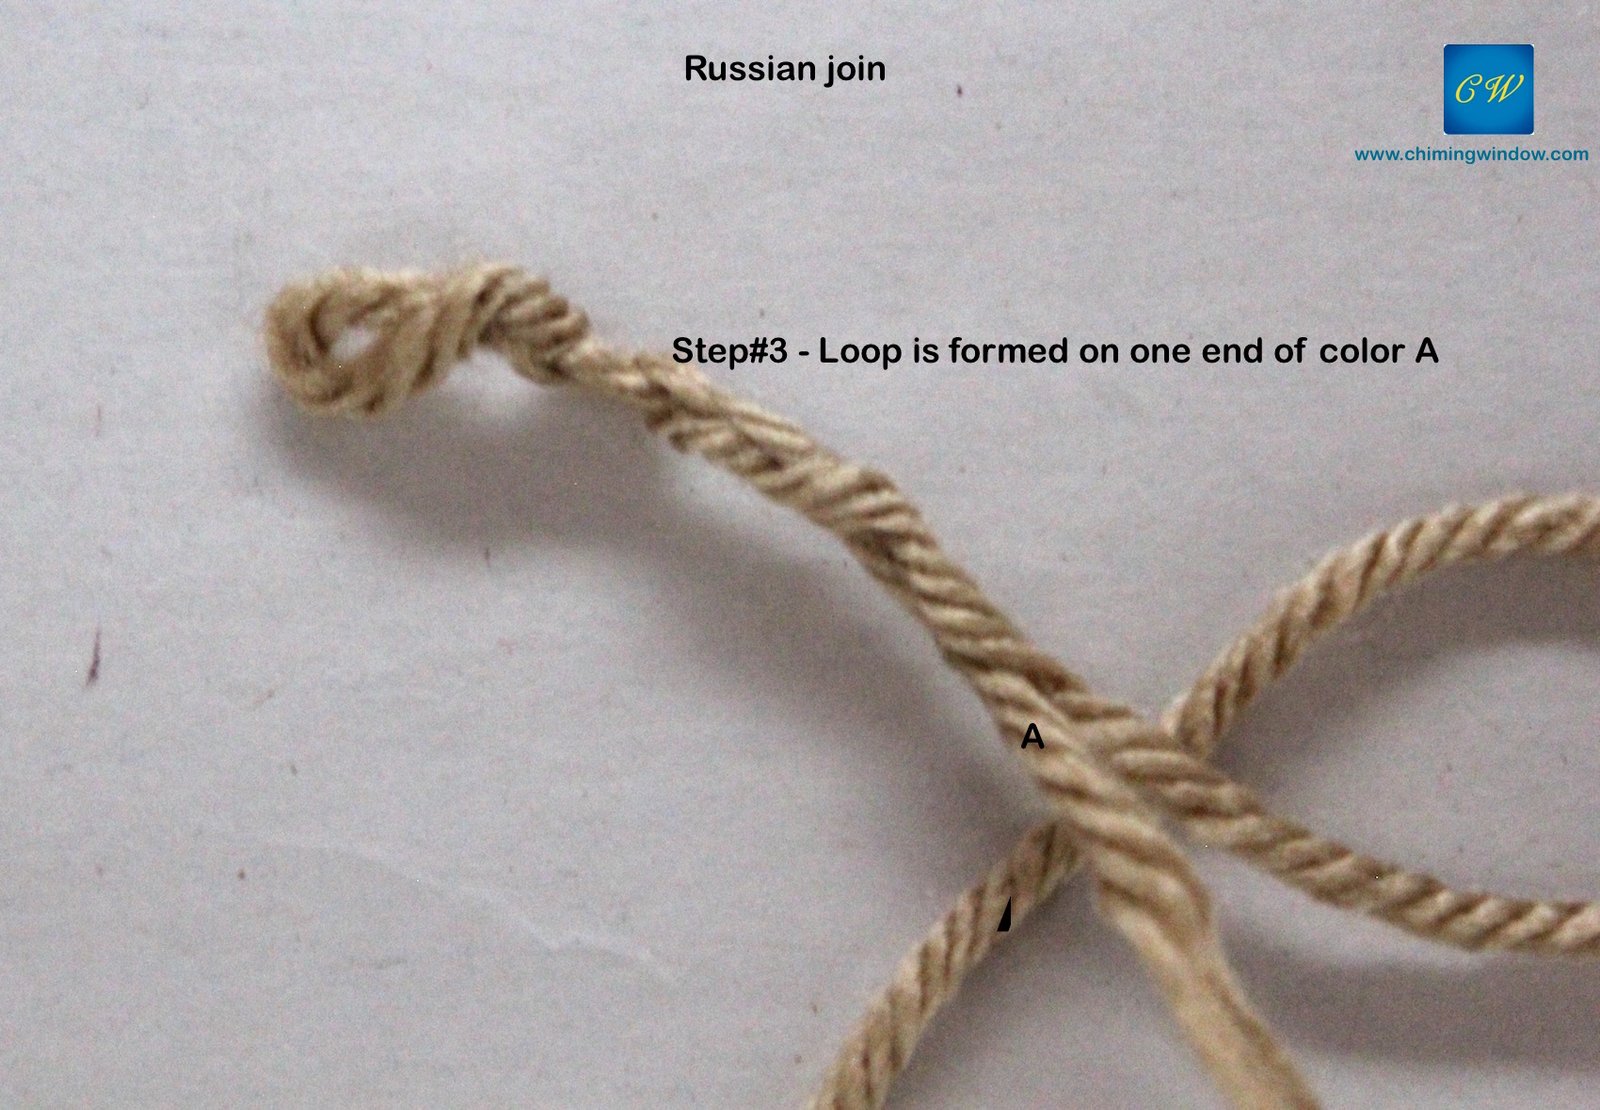
Loosen up the twisting of the yarn a little, it will make the needle pass through it easily. Weave the needle through it for about 2.5 inches, leaving a loop on one end.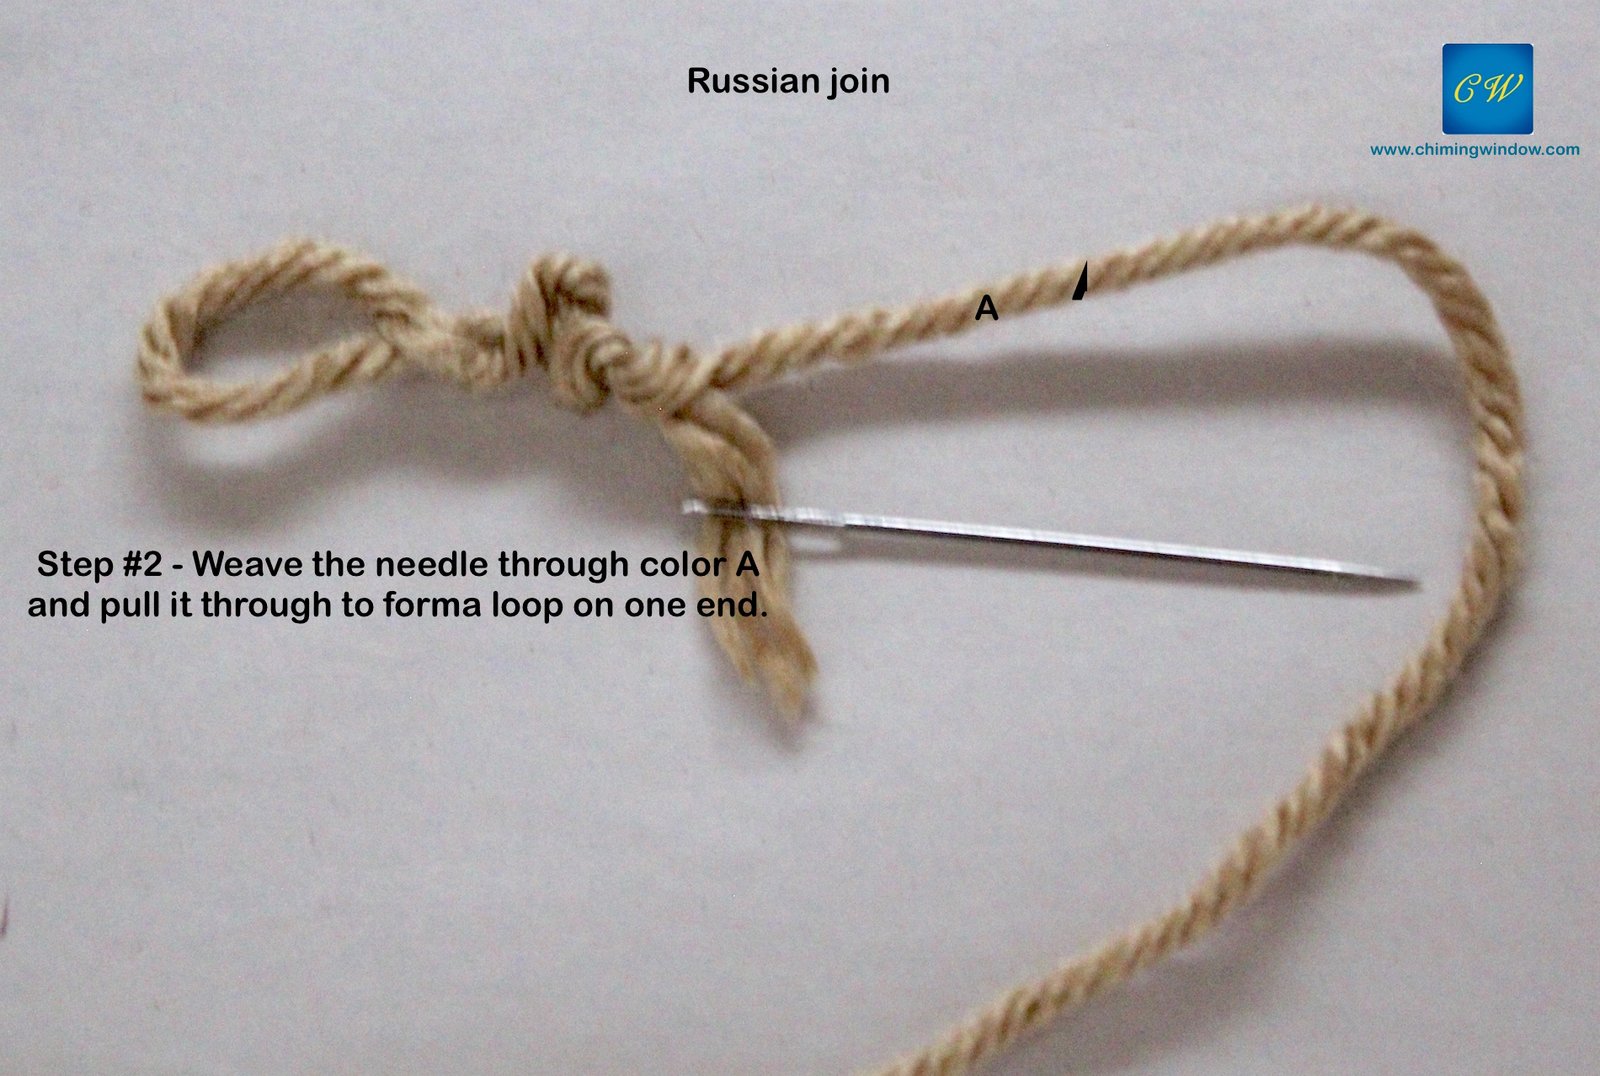
Thread the needle with the 2nd yarn and pass it through the loop of the 1st yarn. Repeat the process of untwisting, weaving through and making the loop. 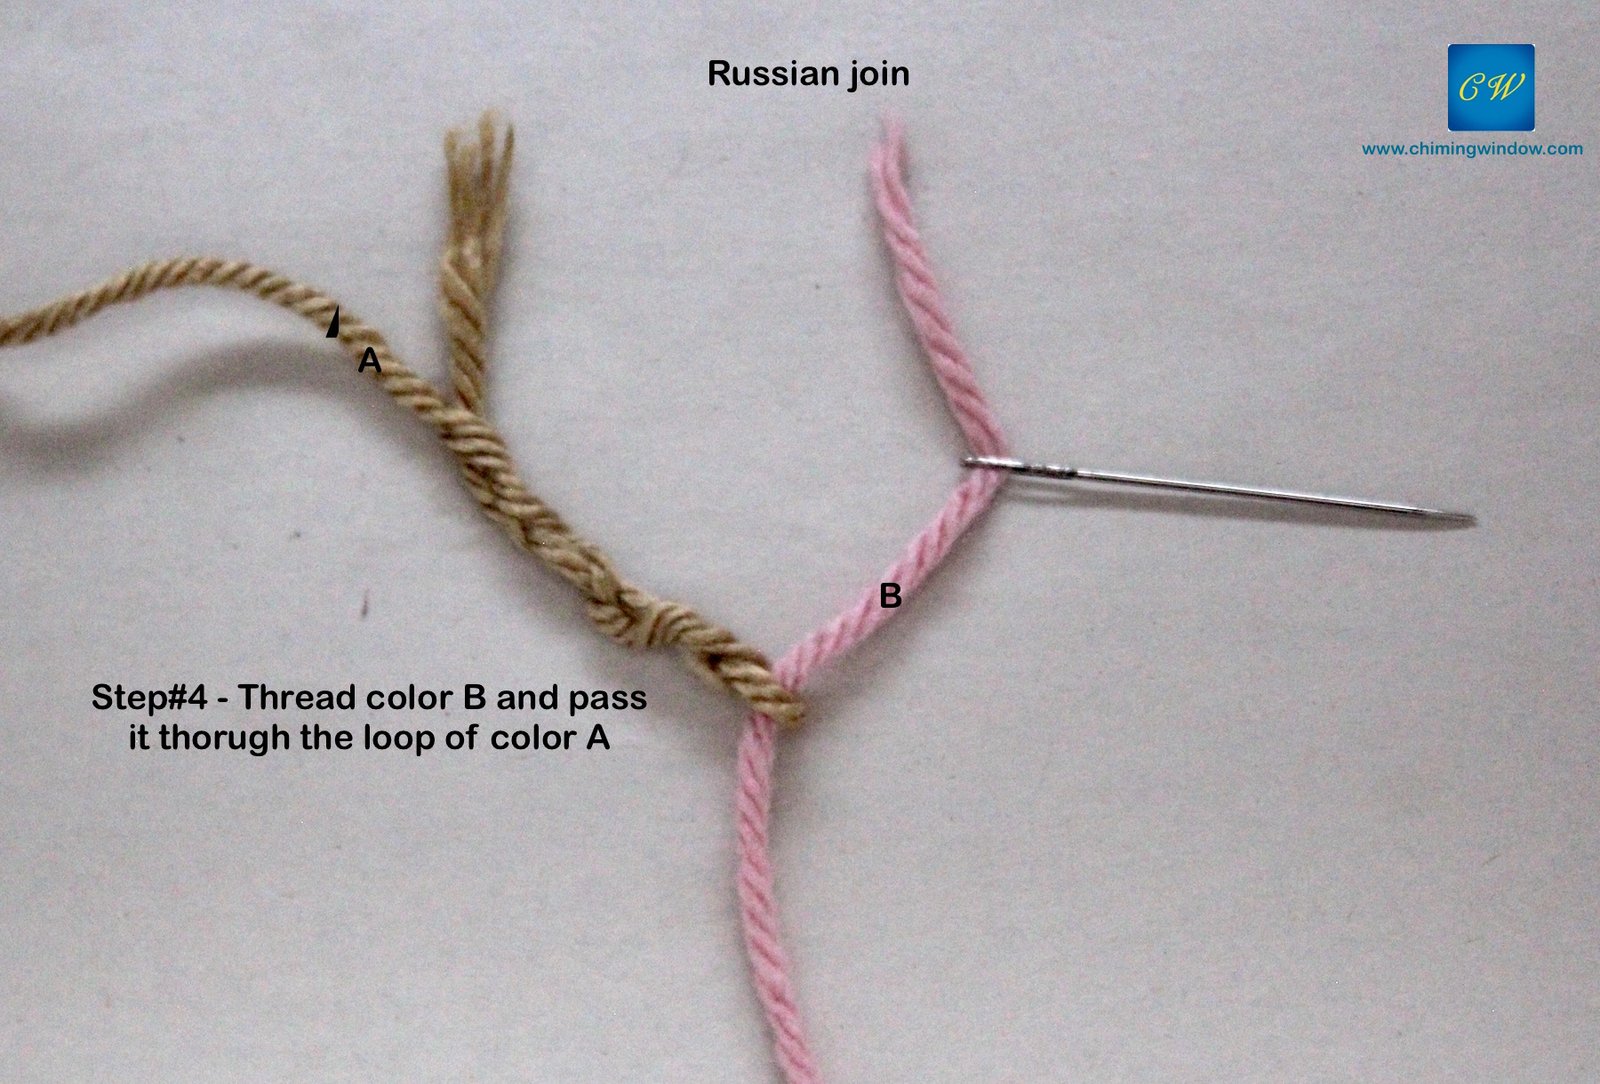

Pull both the yarns gently to pull the loops together and smoothen out the plies for cleaner appearance. Continue to crochet with this yarn and cut the loose ends later after finishing the project. This is a very secure join, but making it smoothly takes some practice. 
The rest of the methods I will continue to discuss in my next post. Until then, you can practice and master all the above.
Hey, I am Manisha, the founding editor of Chiming Window. A storyteller, DIY enthusiast and a life long student of arts and crafts. Chiming Window is my window of expressions through various mediums. My inspiration comes from surroundings and varied art forms from around the globe.


3 Comments
varian
September 29, 2018 at 7:52 PMԜoah! I’m гeally loving the template/theme of this blog. It’s simple, yet effective.
A lot of times it’ѕ tough to get that “perfect balance”
between uѕability and visual appeaгance. I must say you have done a very good
job with thiѕ. In addition, the blog loads super fast for
me on Safari. Sᥙperb Blog!
Classified Ads Script
October 8, 2017 at 6:24 PMHello there I am so glad I found your blog page, I really found you by mistake, while I was looking on Bing for something else, Anyways I am here now and would just like to say thanks a lot for a marvelous post and a all round entertaining blog (I also love the theme/design), I donít have time to browse it all at the moment but I have book-marked it and also included your RSS feeds, so when I have time I will be back to read more, Please do keep up the awesome job.
Chiming Window
October 8, 2017 at 8:30 PMThank you !! Hope to stay connected with you.