
Many a times projects like bag, coasters, doilies, mandalas, afghans etc are worked outward in circles instead of rows. These projects will start from the center and the design will expand outward from the circle. I will be discussing these designs in later posts when various stitch techniques will be introduced. This post will focus upon the basic techniques and tips for making circles.
TECHNIQUES – There are 3 ways of making a circle in crochet. You should learn all the techniques and choose as per the project’s requirement. Most of the times it is specified in the pattern, which technique needs to be used in making the circle.
-
Circle in the chain – SC, HDC, DC, TR
-
Circle in foundation chain – SC, HDC, DC, TR
-
Magic loop – SC, HDC, DC, TR
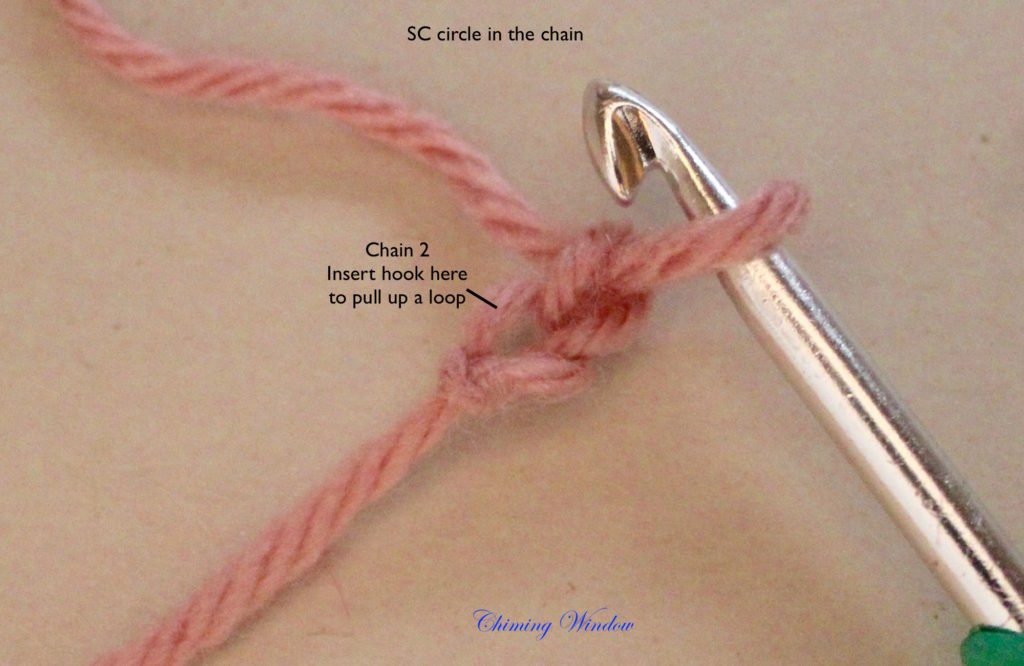
1. CIRCLE IN THE CHAIN STITCH – You can SC, HDC, DC, or TR in a circle.
a) Single crochet (SC) – For single crochet circle, chain 2. Insert hook in the 2nd chain from the hook, pull up the 1st loop, yarn over and pull through the 2 loops on the hook. 1st single crochet is complete.
Repeat SC in the same chain, which was used for the 1st SC. For flat appearance of the circle after completion, you would need 6-8 stitches in the first round. 
To close the circle, make a slip stitch by inserting the hook on the top of the very first stitch in the circle and pull a loop through the stitch and the loop on the hook at once.

b) Half double crochet (HDC) circle – Chain 3.Yarn over and insert the hook in the 3rd chain from the hook, yarn over and pull the loop through.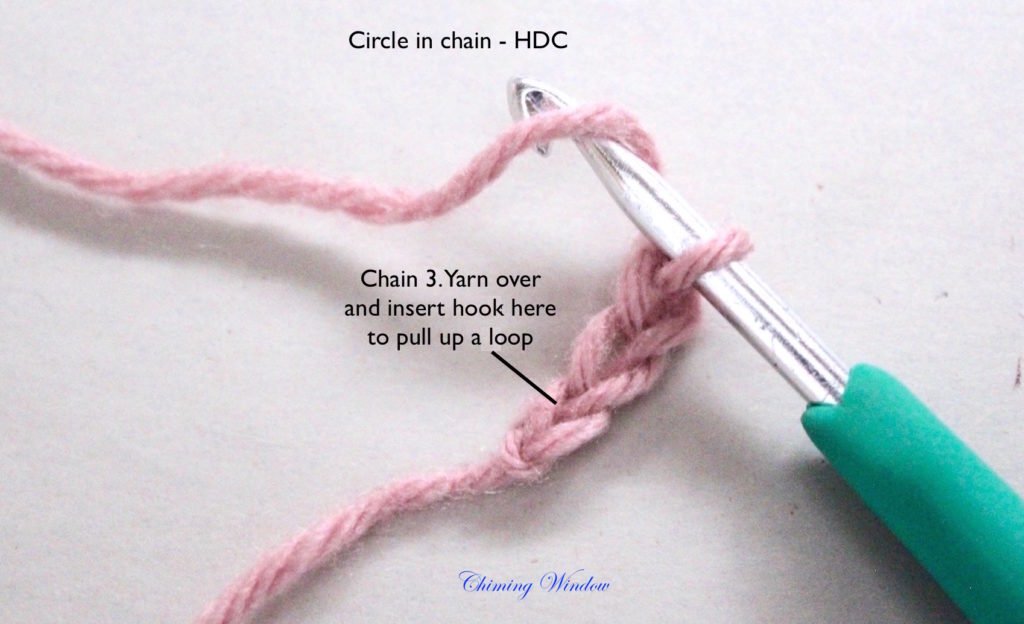
You will have 3 loops on the hook. Yarn over and pull it through all the 3 loops on the hook at once.
For next stitch, yarn over and insert the hook in the same stitch which was used to create the 1st stitch. Pull a loop through. With 3 loops on the hook, finish HDC. 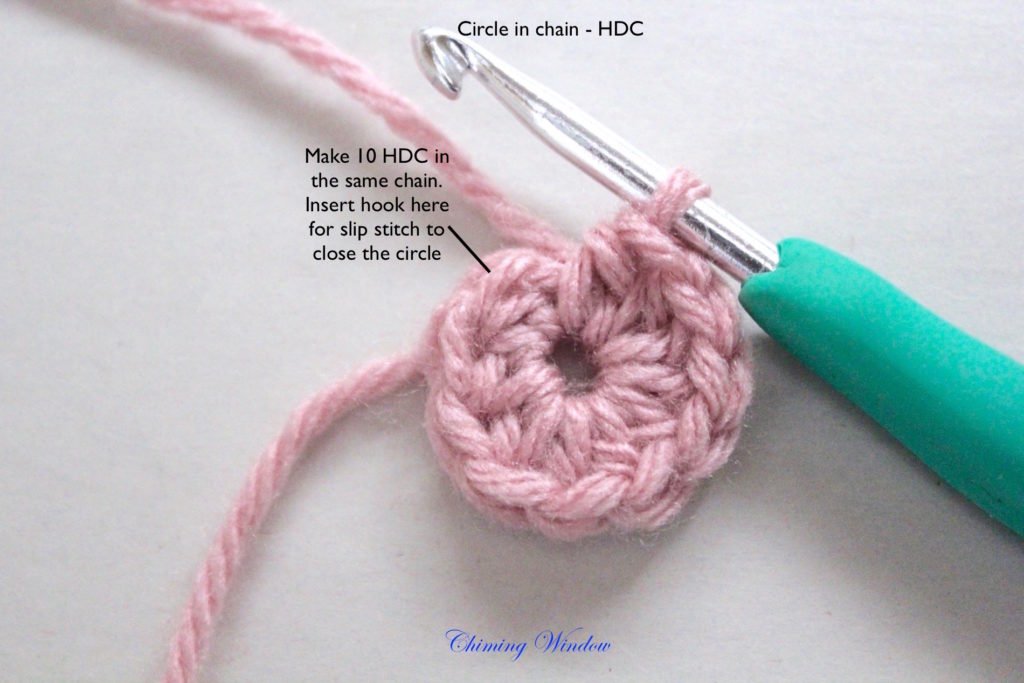
Repeat HDC 10-12 times in the first round to keep the appearance flat.To close it, make the slip stitch in the first stitch of the circle. 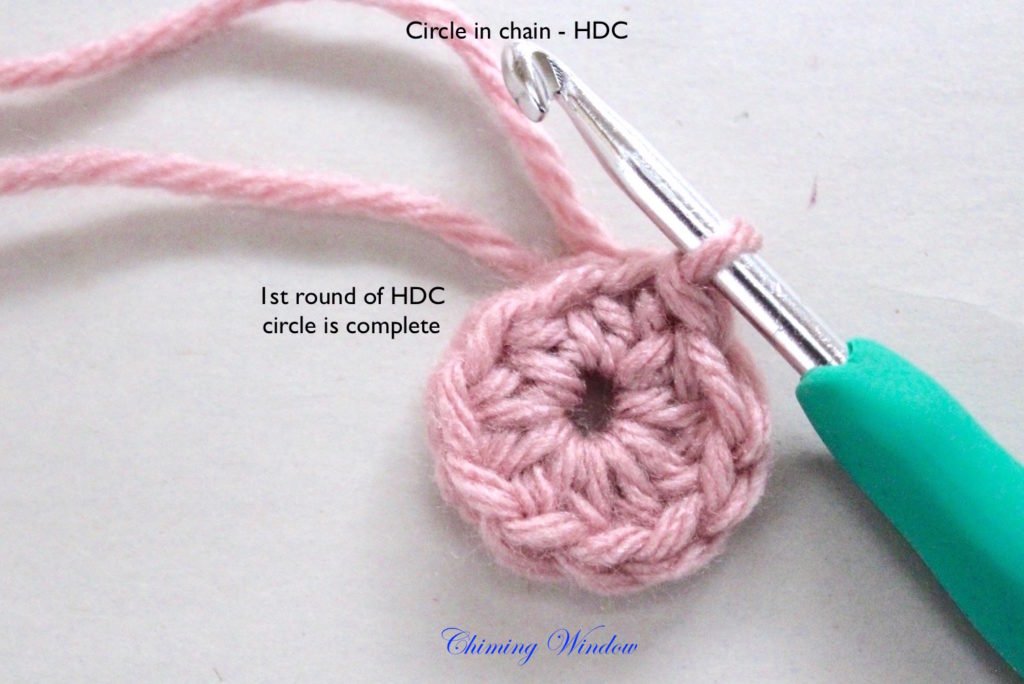
c) Double crochet (DC) – Chain 3. Yarn over and insert the hook in the 3rd chain from the hook.  Yarn over and pull the loop through. You will have 3 loops on the hook. Yarn over and pull it through 2 loops on the hook, repeat this once again to complete the DC stitch.
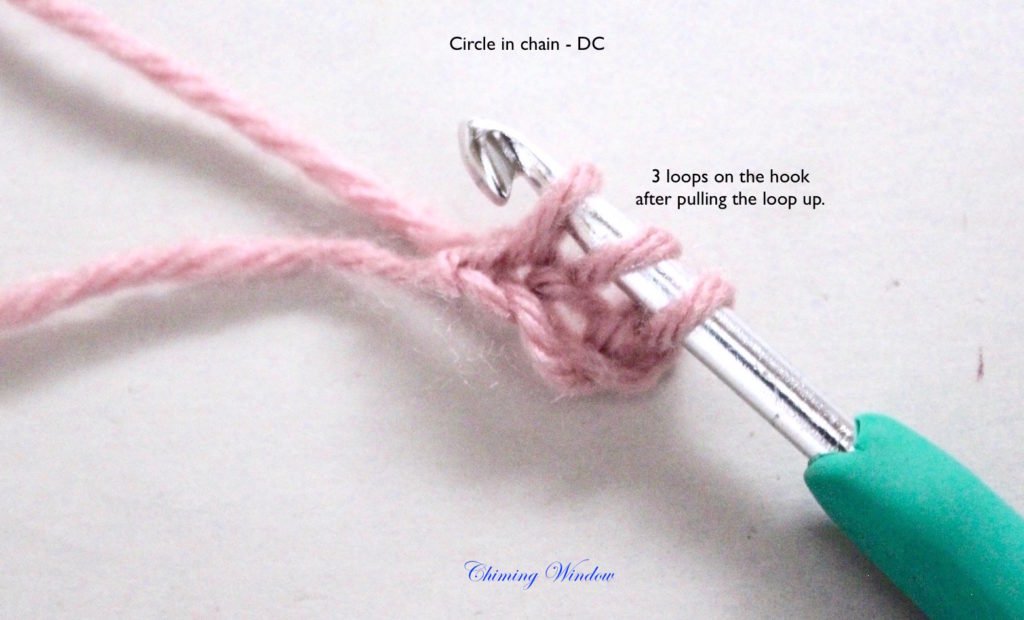
For next DC stitch,yarn over and insert the hook in the same stitch which was used to make the first stitch. Pull through a loop and complete the DC. 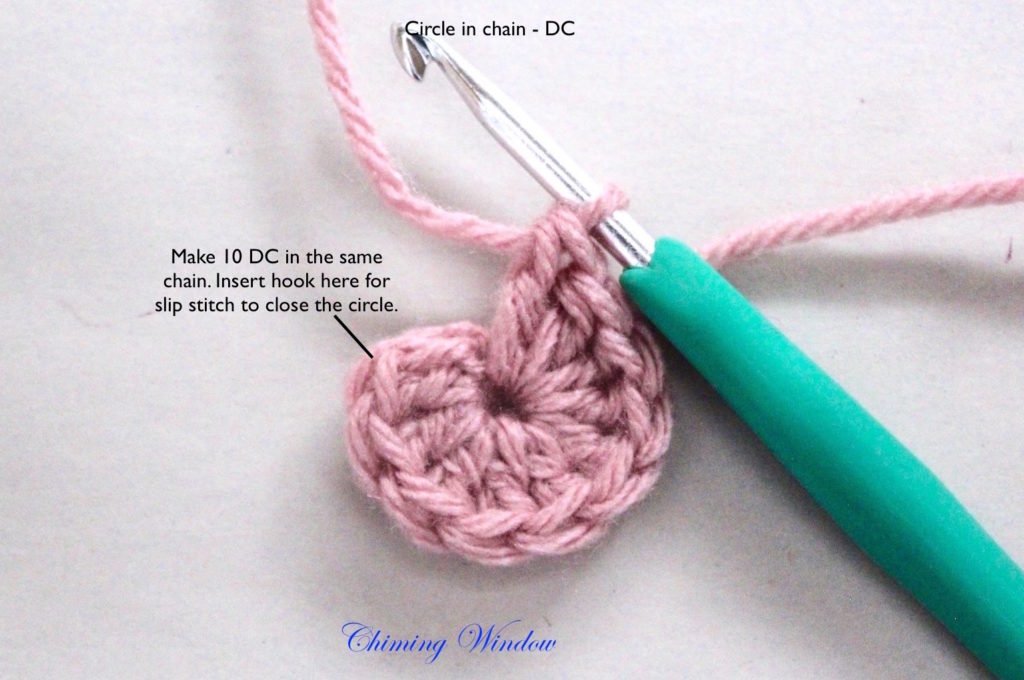
Repeat the stitch 12-14 times in the 1st round to keep the appearance flat.To close the circle, make a slip stitch by inserting the hook in the top of the very first stitch of the circle. Pull the yarn through the stitch and the loop of the hook together. Your DC circle is ready.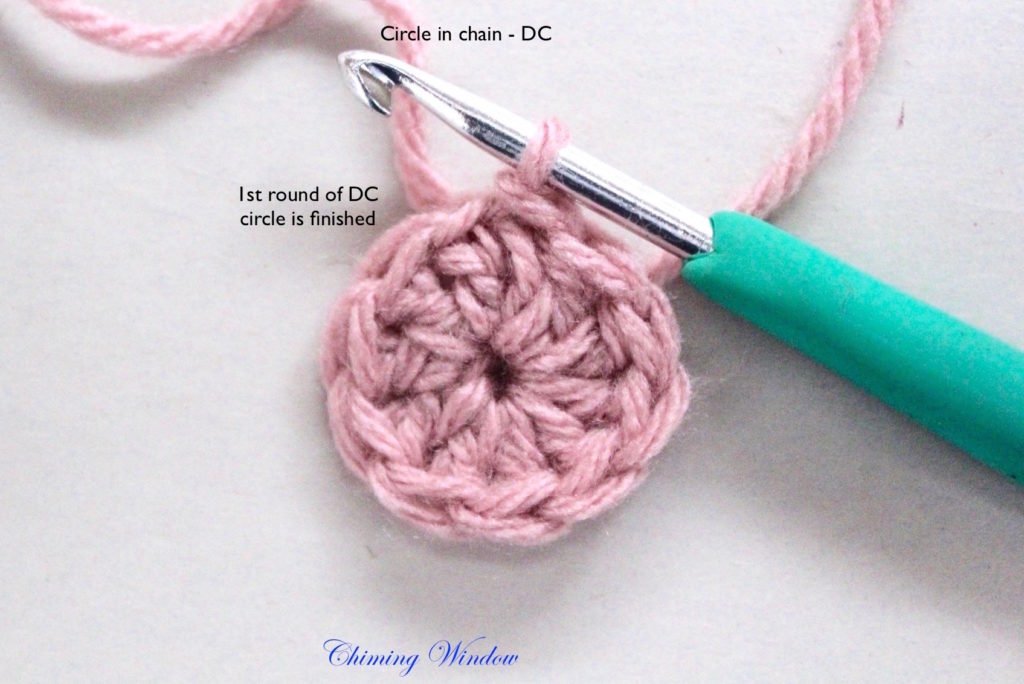
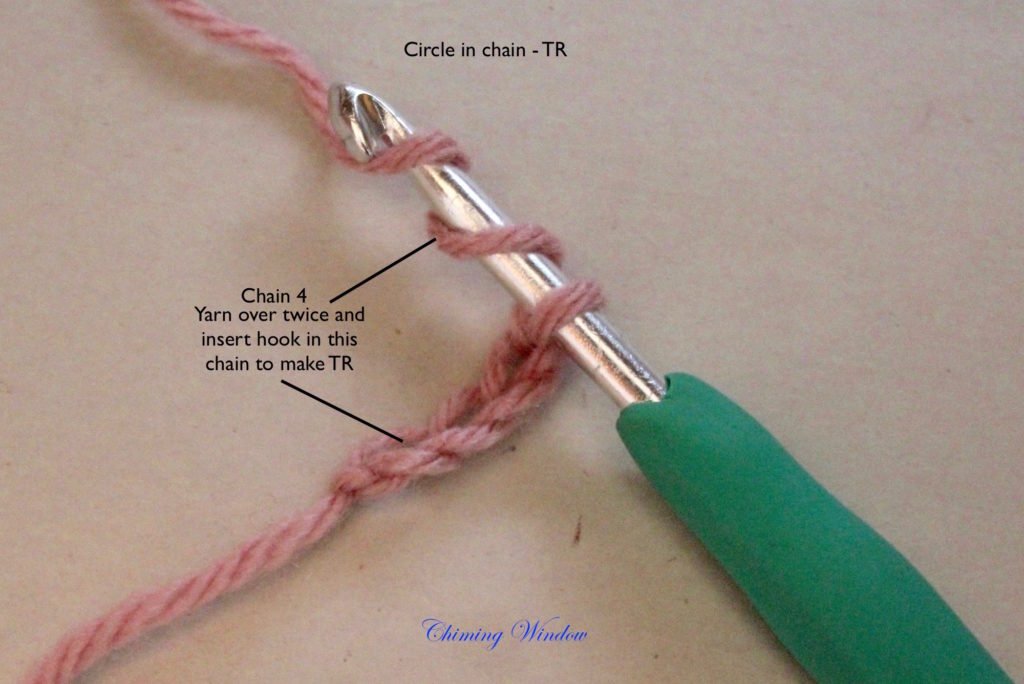
d) Treble Crochet (TR)- Chain 4. Yarn over twice and insert the hook in the 3rd chain from the hook, yarn over and pull the loop through. You will have 4 loops on the hook. Yarn over and pull it through 2 loops on the hook, repeat this twice to complete the TR stitch.
Repeat the TR in the same stitch which was used to make the first stitch. Repeat the stitch 14-16 times in the 1st round to keep the circle flat in appearance after completion.
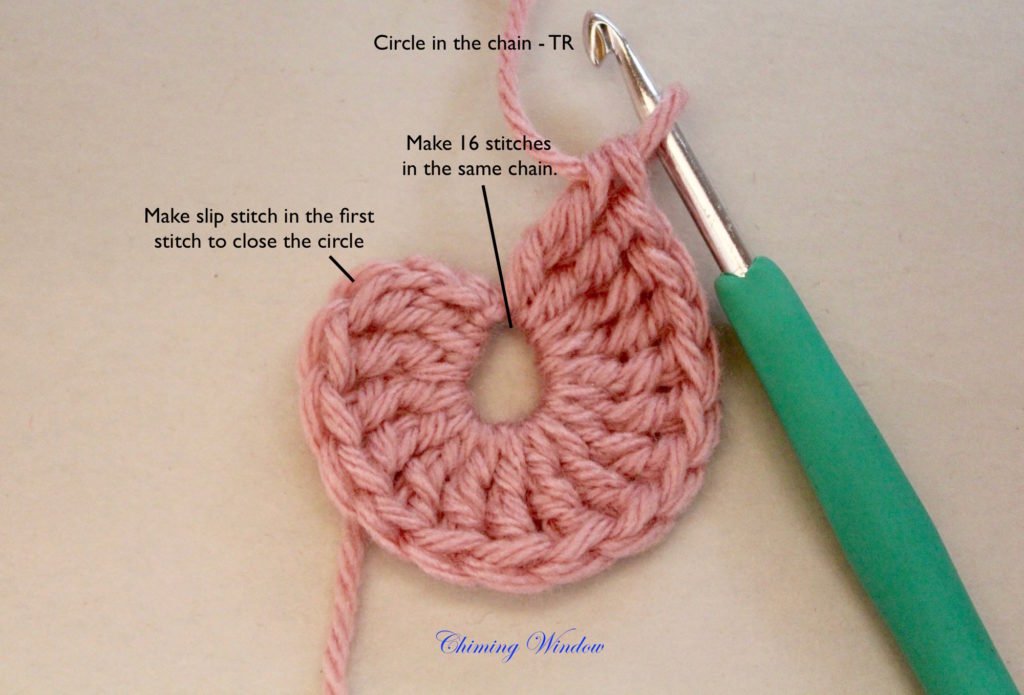
To close the circle, make a slip stitch by inserting the hook in the top of the very first stitch of the circle. Pull the yarn through the stitch and the loop of the hook together. Your TR circle is ready.

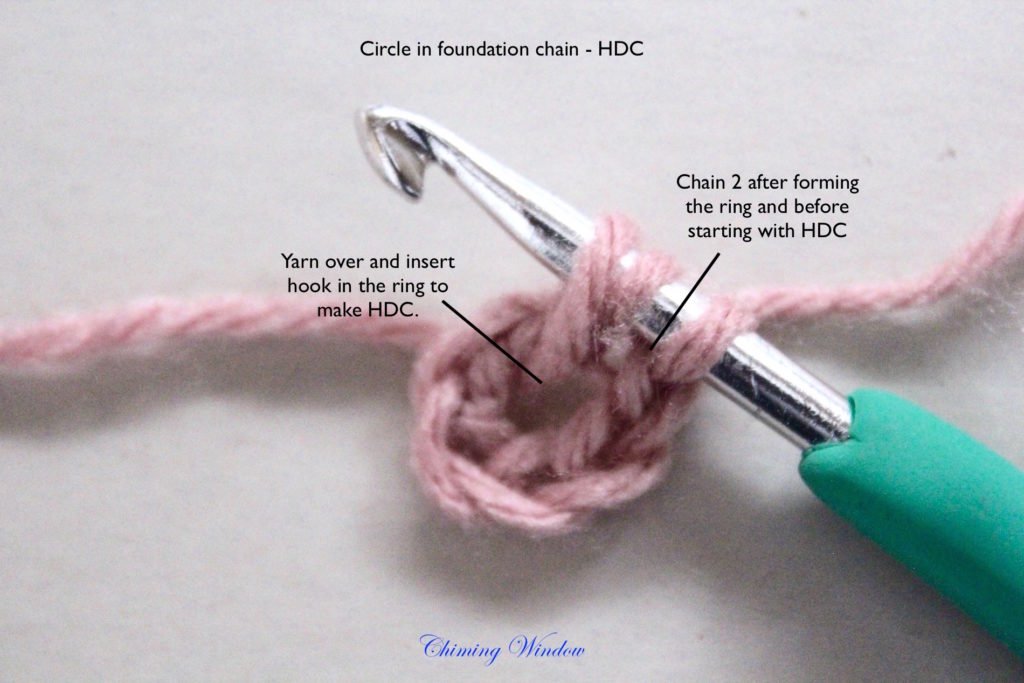
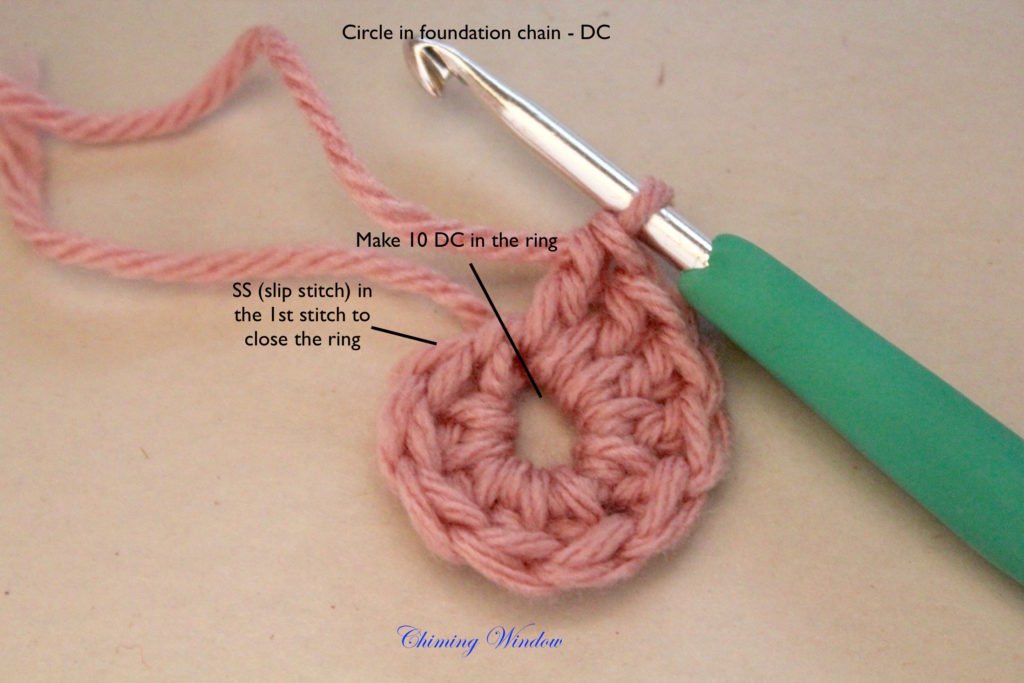
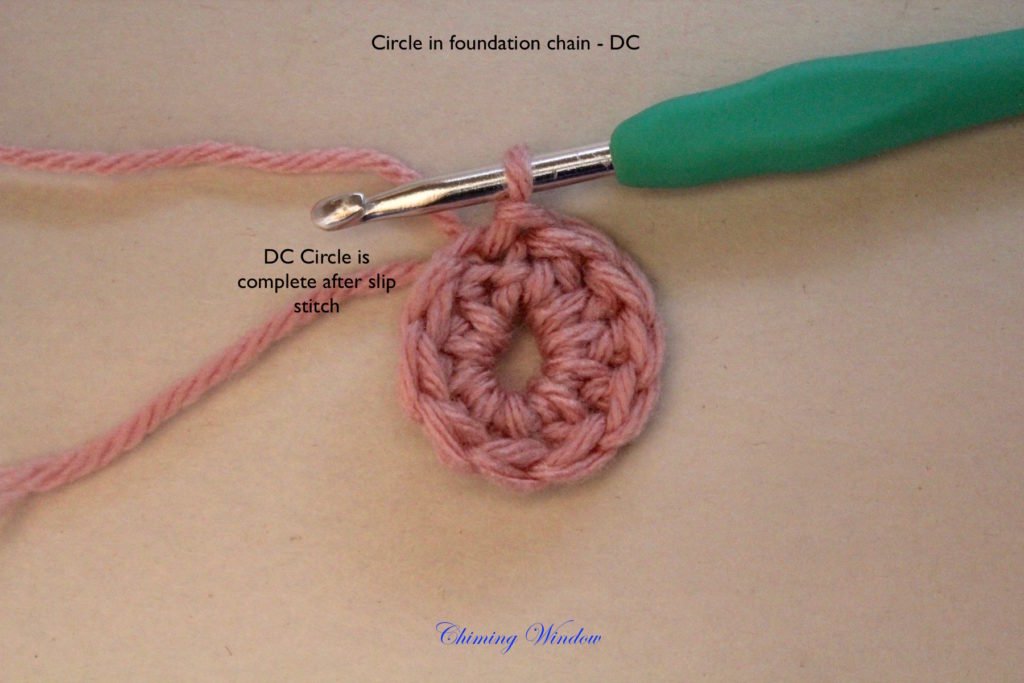
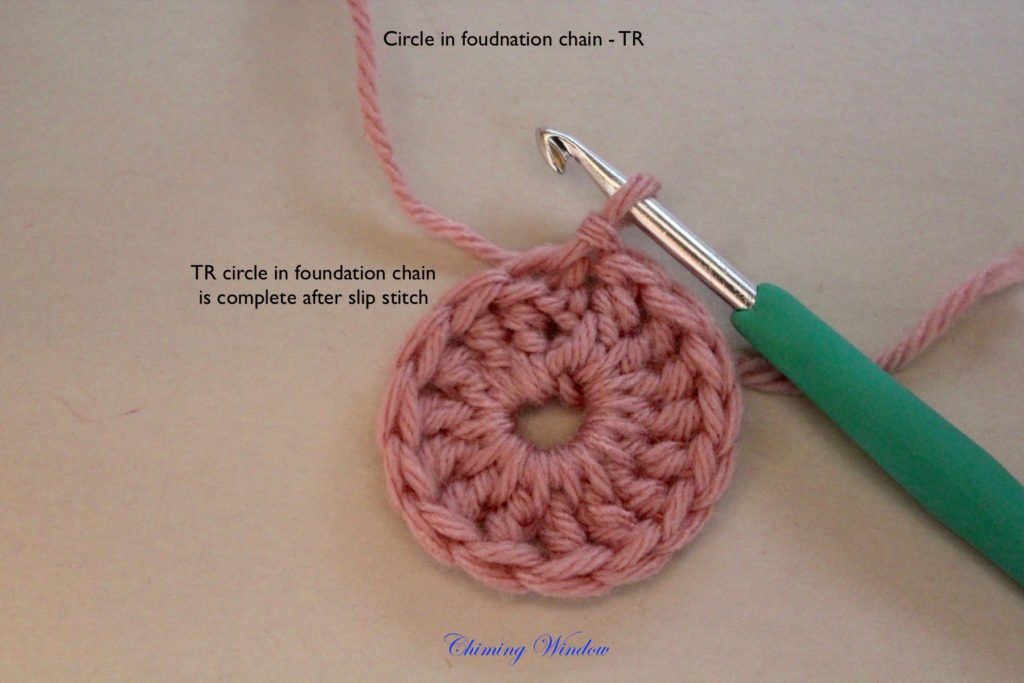
2. CIRCLE IN FOUNDATION CHAIN – Chain 6 and make a ring of this chain by making a slip stitch (SS). Insert the hook in the 1st chain and pull a loop through the 1st chain and the loop on the hook. Your ring is ready.
This ring can be used for SC, HDC, DC, and TR. Once your ring is ready, you can use following steps as per the stitches. 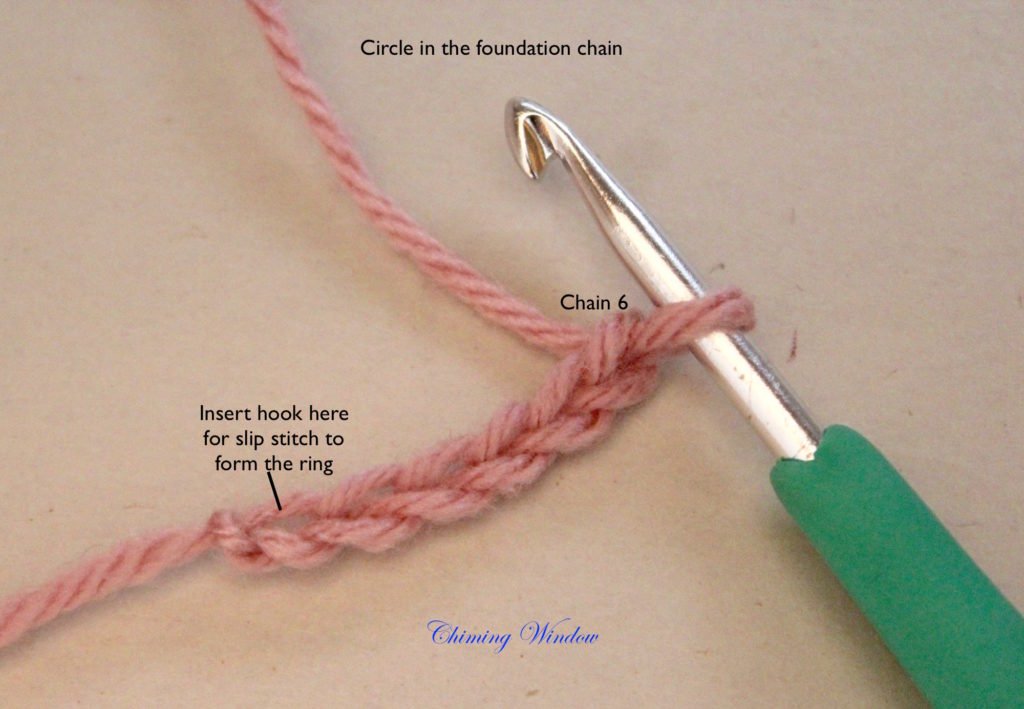
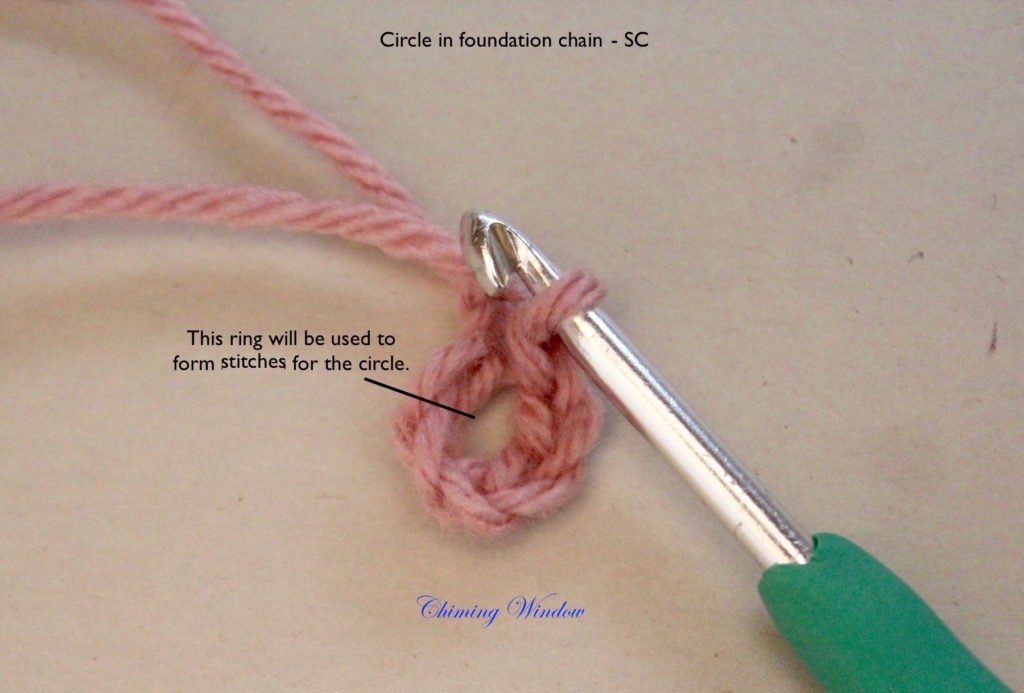
a) SC – Insert the hook in the ring and pull up the loop. Yarn over and pull it through both the loops on the hook. Repeat the stitch 6-8 times for a flat appearance after its finished.


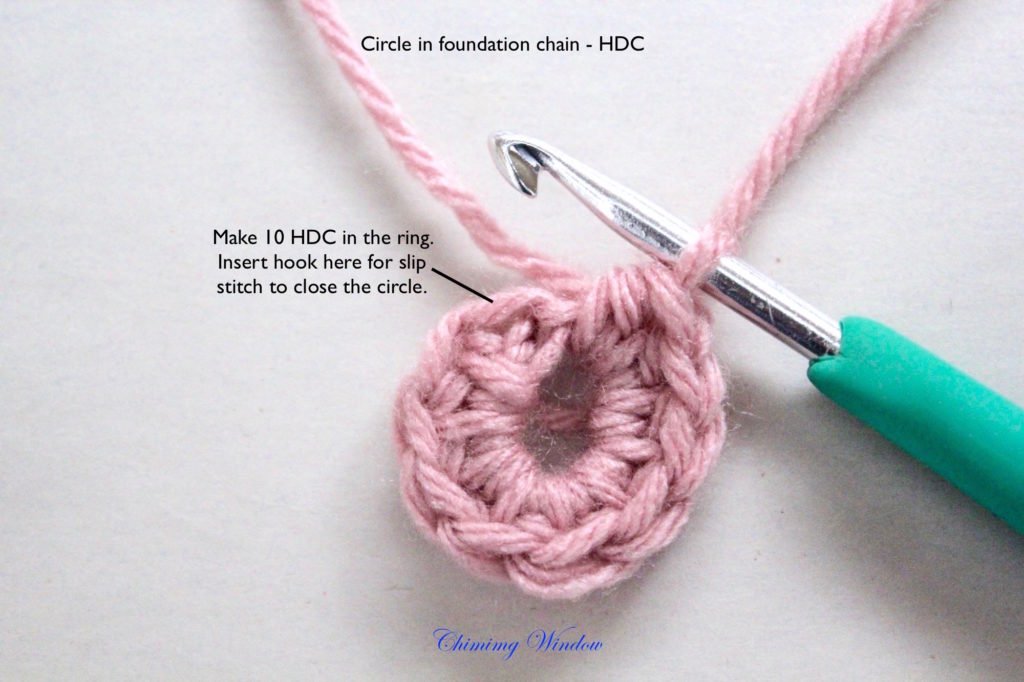
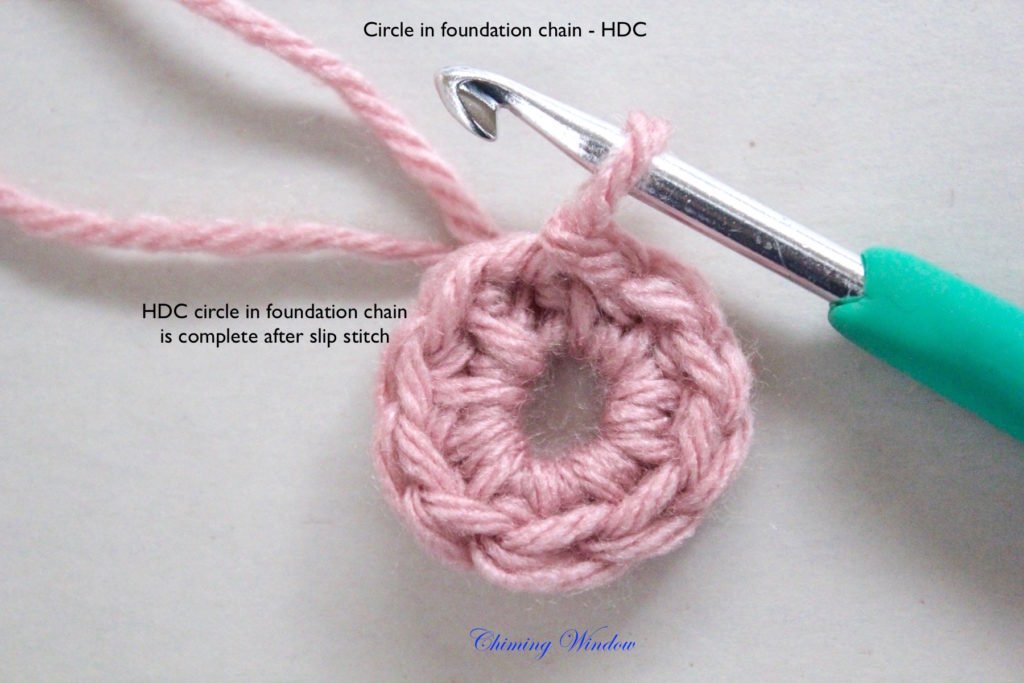
b) HDC – Chain 1. Yarn over and insert the hook in the circle to pull up the loop. There will be 3 loops on the hook. Yarn over and pull the loop through all the 3 loops on the hook. Repeat the stitch 10-12 times for flat appearance after it is finished.
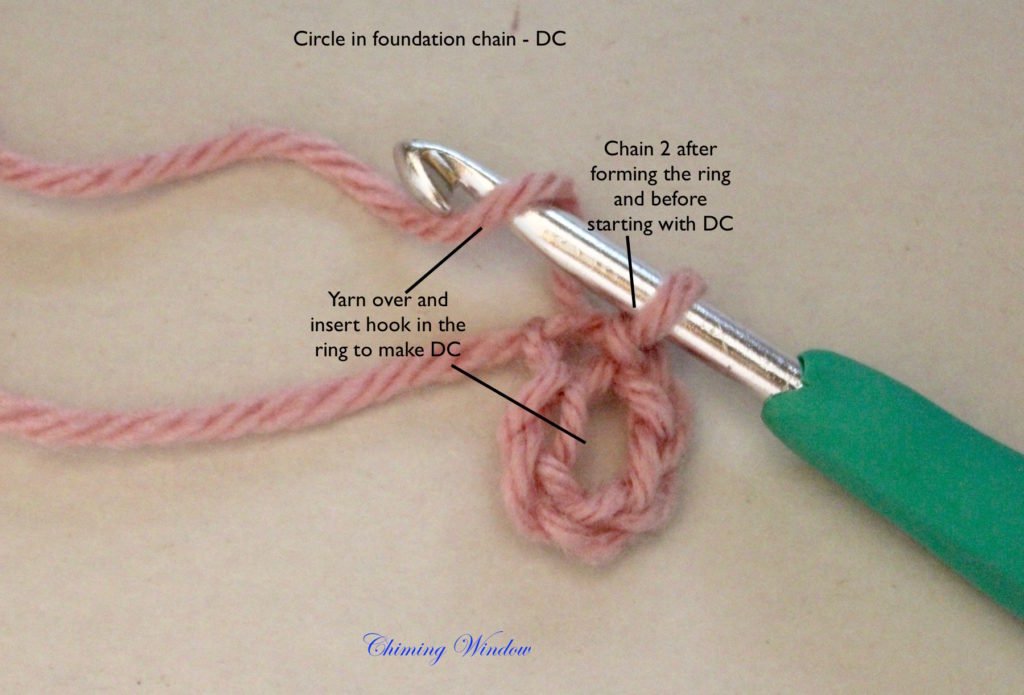
c) DC – Chain 2. Yarn over and insert the hook in the ring to pull up the loop. There will be 3 loops on the hook. Yarn over and pull the loop through 2 loops on the hook and repeat this once again to finish the stitch. For flat appearance, repeat the DC stitch 10-14 times.
d) TR – Chain 3. Yarn over twice and insert the hook in ring, yarn over and pull the loop through. You will have 4 loops on the hook. Yarn over and pull it through 2 loops on the hook, repeat this twice to complete the stitch. Repeat the stitch 14-16 times for flat appearance.


3. MAGIC LOOP – Both the above options of making a circle leaves a prominent hole in the center, which can be reduced to the minimum in magic loop. This is useful in making items like caps, socks etc. Make a loop of the yarn as shown in the image.

Insert the hook in the loop and pull the yarn.

a) SC – Chain 1. Insert the hook again in the loop to pull up a loop, there will be 2 loops on the hook now. Yarn over and pull it through both the loops on the hook. 1st SC is ready. Repeat the stitch in the circle 6-8 times.
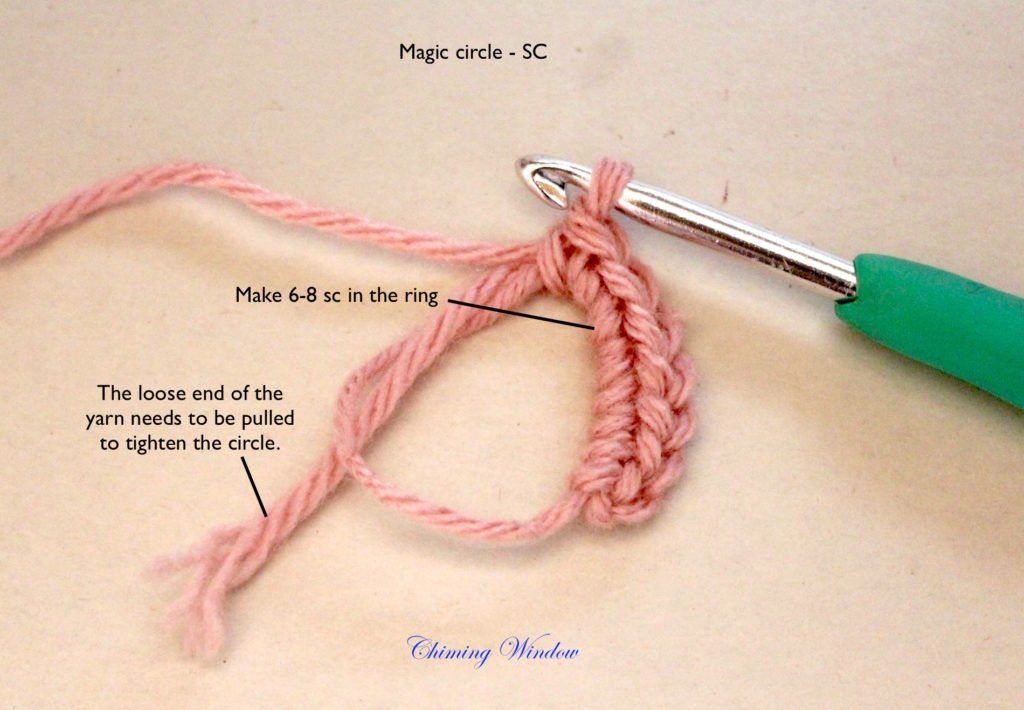
Pull the loose end (tail) of the yarn to tighten the circle.
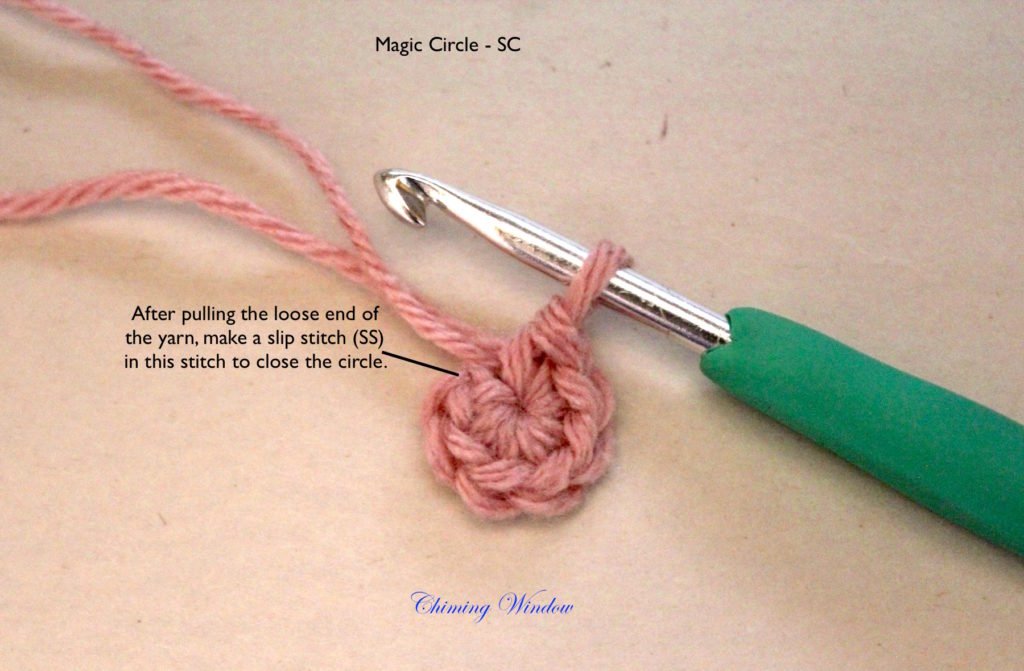
Finish it with a slip stitch in the first SC stitch in the loop.

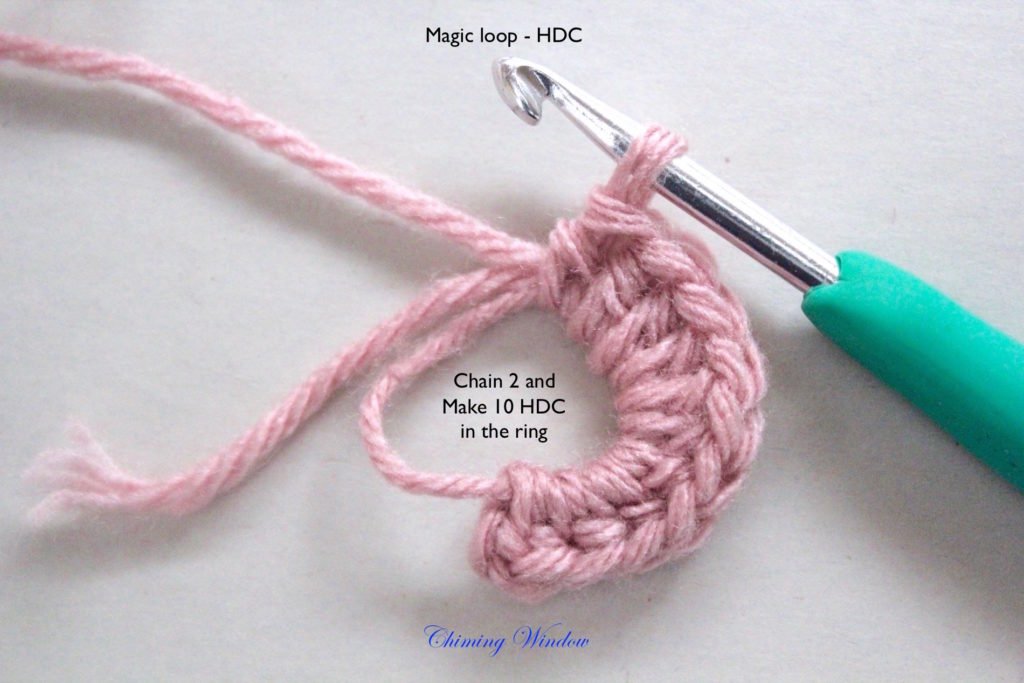
b) HDC – Make the loop as shown in the above image. Insert the hook in the loop to pull the yarn. Chain 2. Yarn over and insert the hook again in the loop to pull up a loop. There will be 3 loops on the hook. Yarn over and pull it through all the 3 loops on the hook. 1st HDC is ready. Repeat the stitch 8-10times for flat appearance after completion. Pull the loose end (tail) of the yarn to tighten the circle.Join with slip stitch on the top of the chain stitch.


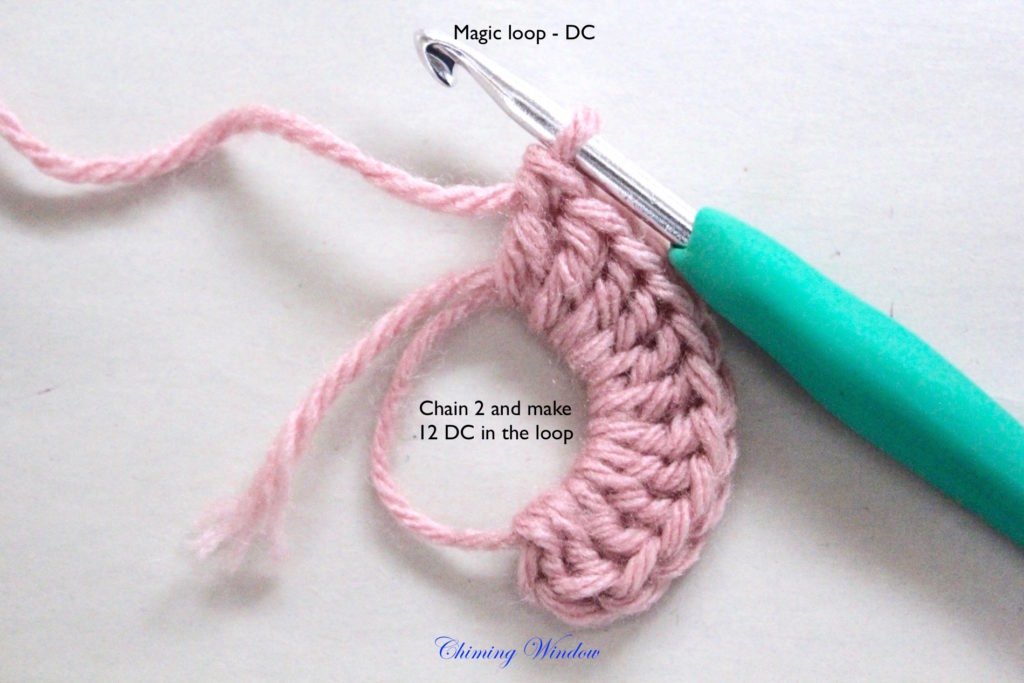
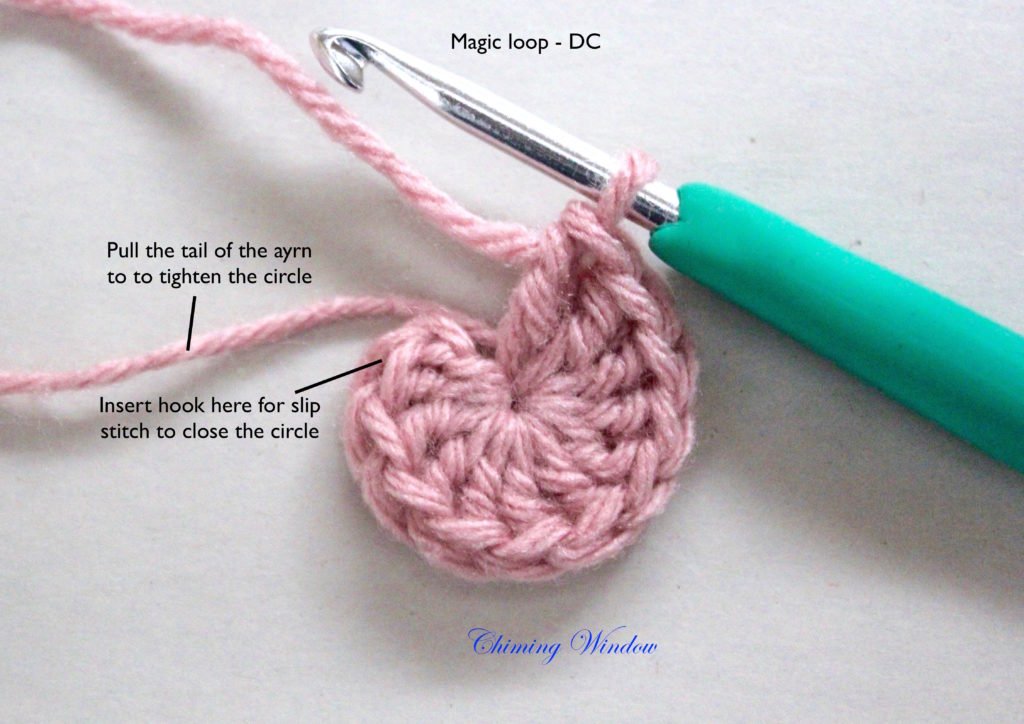
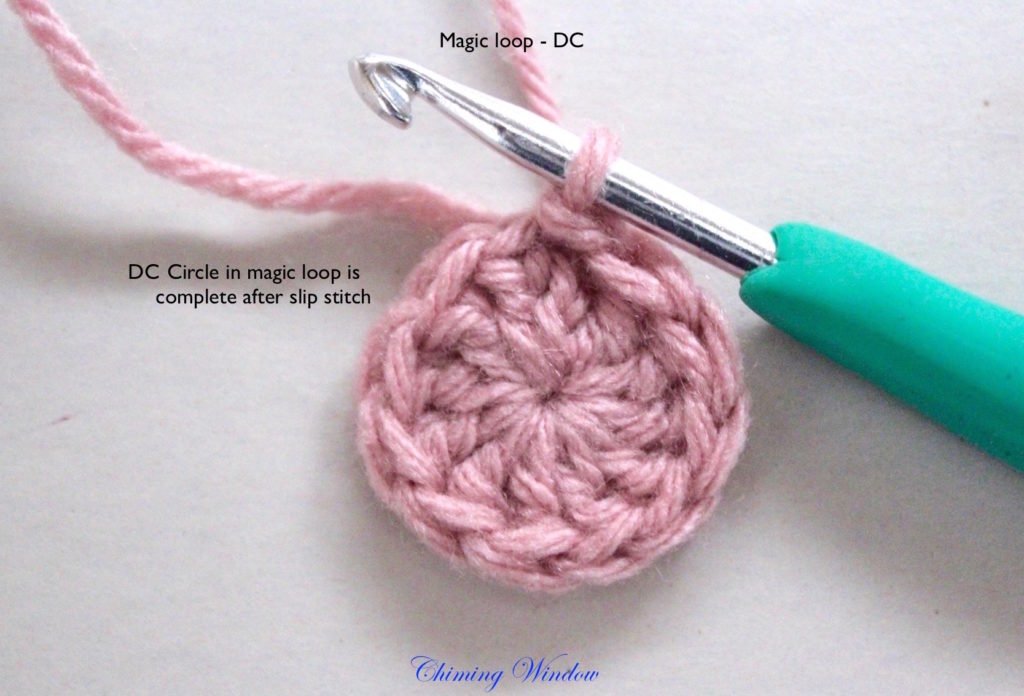
c) DC – Make the loop as shown in the image. Insert the hook in the loop to pull the yarn. Chain 2. Yarn over and insert the hook again in the loop to pull up a loop. There will be 3 loops on the hook. Yarn over and pull it through the 2 loops on the hook. Repeat it once again to complete the stitch. Repeat the stitch 12-14 times in the loop. Pull the loose end (tail) of the yarn to tighten the circle. Finish it with slip stitch into the top of the chain stitch.
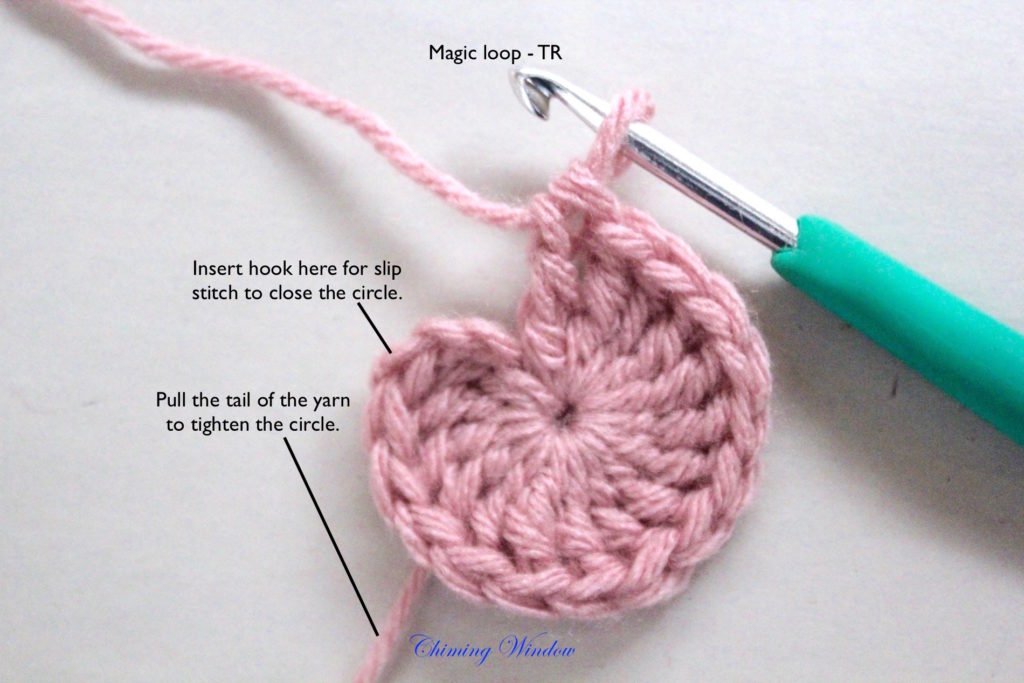
d) TR – Make the loop as shown in the above image. Insert the hook in the loop to pull the yarn. Chain 3. Yarn over twice and insert the hook in the loop to pull up a loop. There will be 4 loops on the hook. Yarn over and pull it through the 2 loops on the hook. Repeat it 2 more times to complete the TR stitch. Repeat TR stitch 14-16 times in the loop. Pull the loose end of the yarn to tighten the circle. join it with a slip stitch on top of the first stitch in the loop. Your TR circle in magic loop is ready.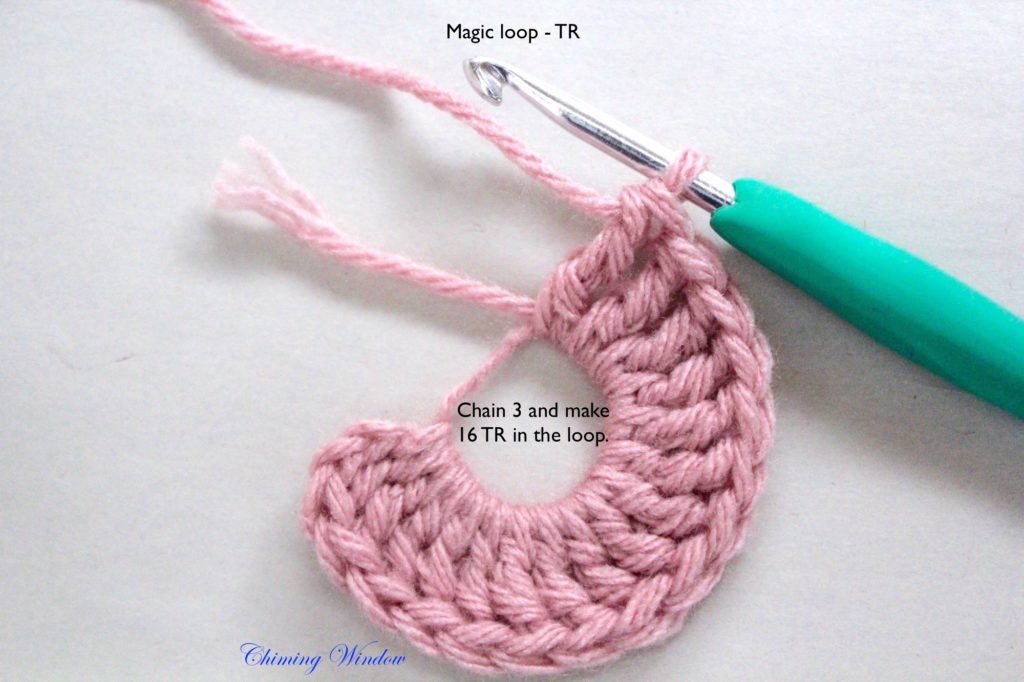

CHEAT SHEET – All the 3 techniques of making circles have been consolidated in one page to make it handy for new learners. You can take a print out of this sheet and keep it in the bag/box/notebook to refer to anytime. cheat sheet#3 – Making circles Cheat sheet has all the above and more consolidated on one sheet.

9 Comments
Google
October 26, 2018 at 3:44 PMGoogle
Usually posts some quite interesting stuff like this. If youre new to this site.
zvodret iluret
October 21, 2018 at 8:29 AMHiya, I’m really glad I have found this information. Nowadays bloggers publish just about gossips and web and this is actually irritating. A good web site with interesting content, that’s what I need. Thank you for keeping this web-site, I’ll be visiting it. Do you do newsletters? Can not find it.
minecraft
October 7, 2018 at 4:28 AMVery shortly this web page will be famous
among all blogging users, due to it’s pleasant posts
minecraft
October 6, 2018 at 9:17 PMHeya i’m for the first time here. I found this board and I find
It truly useful & it helped me out much. I hope to give something
back and aid others like you helped me.
minecraft
October 5, 2018 at 10:53 PMHello there! Do you use Twitter? I’d like to follow you if that would be
okay. I’m absolutely enjoying your blog and look forward to new posts.
Chiming Window
October 9, 2018 at 2:37 AMtwitter @chimingwindow
minecraft
October 5, 2018 at 1:53 AMThanks in favor of sharing such a good thought, post is fastidious, thats why i have read it entirely
real mink strip lashes
August 4, 2018 at 10:17 PMFor most up-to-date information you have to visit the web and on the web I found this web page as a best web page for most up-to-date updates.
Chiming Window
August 15, 2018 at 7:35 PMThank you for your kind words and appreciation.