SIMULATED BRAID SEAM – (With Hook)
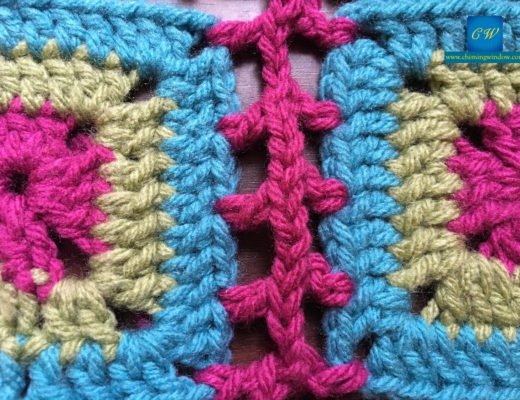
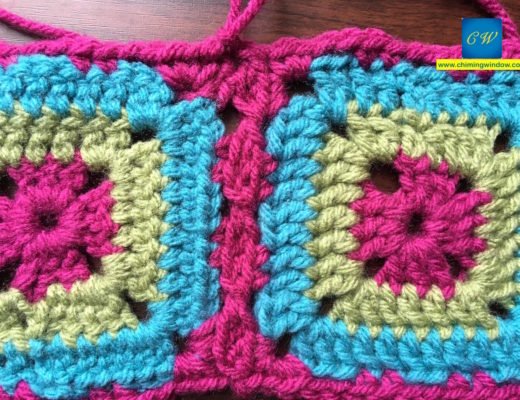
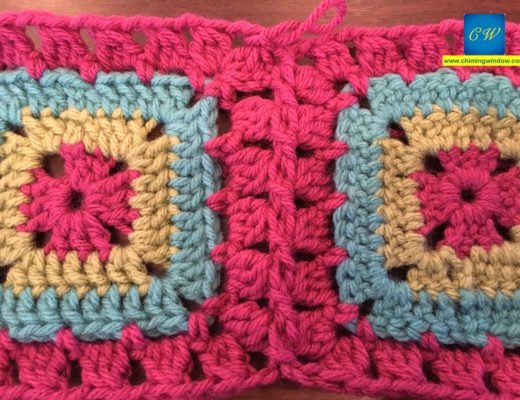
Simulated braid is another beautiful seam which adds space between 2 pieces with a lovely braid in the center. This is done from the wrong sides of the pieces. Keep your pieces with wrong sides facing up. This can be used on granny squares and other pieces.
Follow the steps as listed below. Images with the steps will help in better understanding on the movement of the hook. You can use matching or contrast yarn. As in all other posts, I have use contrast color to show the movement of the yarn and final appearance clearly.
Join yarn in the corner stitch of piece #1 with 1SC. 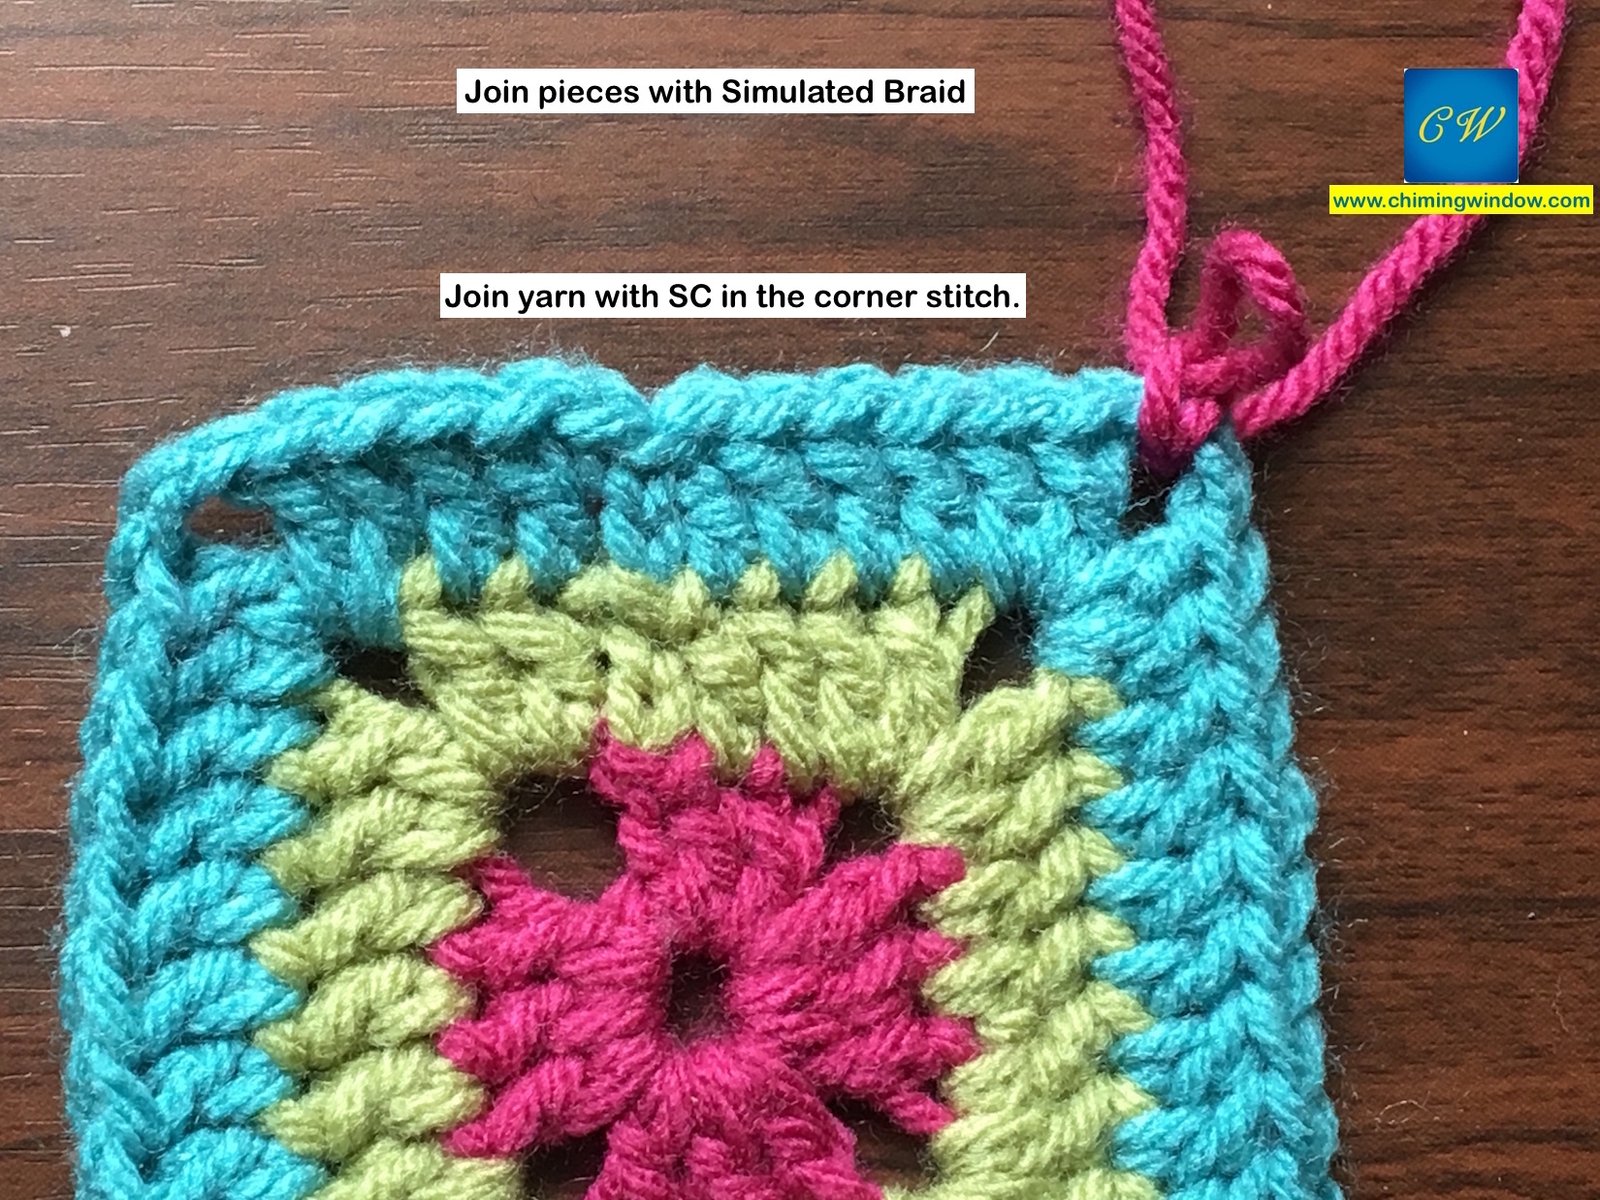 CH3 and make 1SC in the same corner stitch. *CH3, skip 3 stitches and 1SC in the 4th stitch* repeat all around the piece#1 with 1SC,CH3,1SC in each of the corner stitch. In the end join with slip stitch to the first SC.
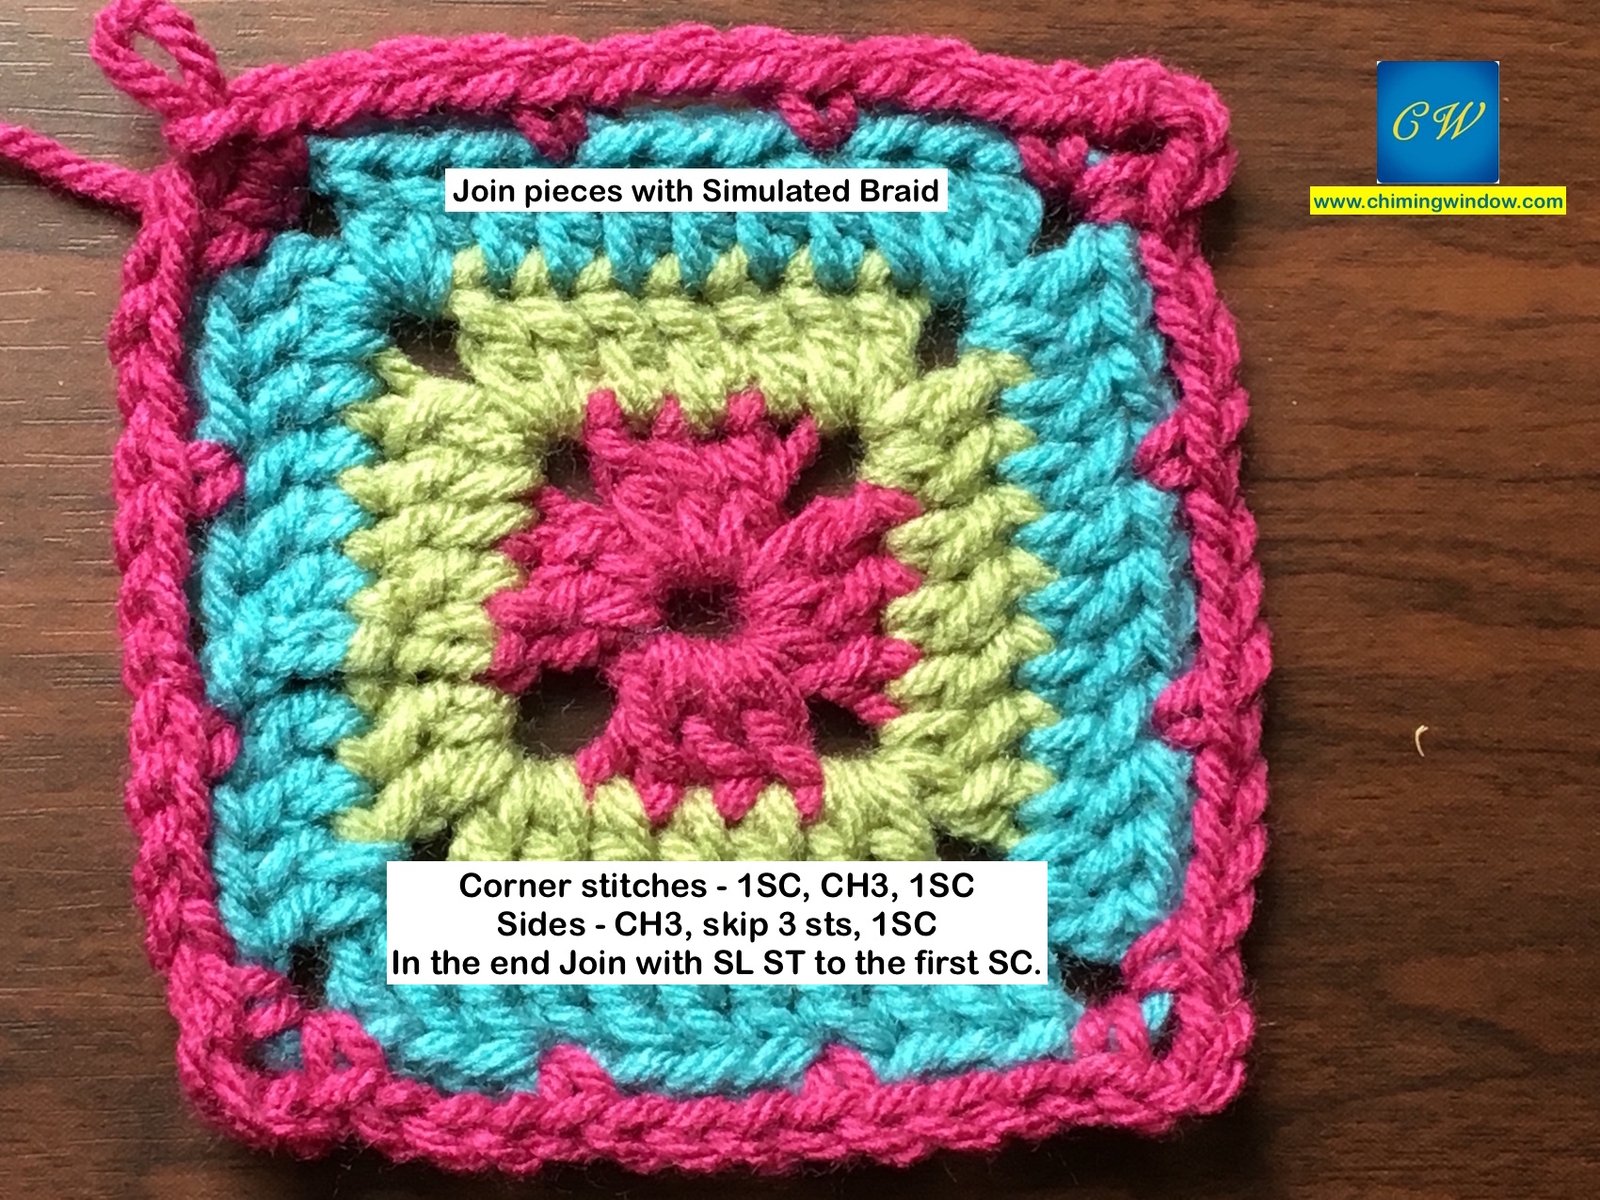
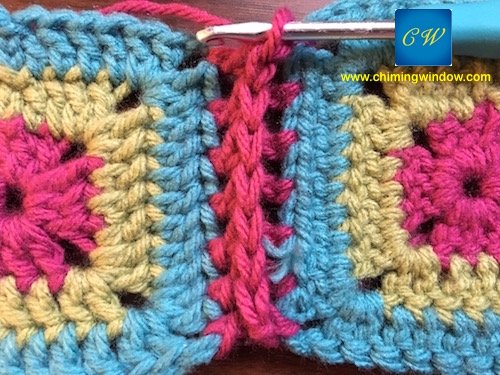
Piece#2 – Repeat the above on piece 2. After slip stitch join of round #1, insert hook in the corner CH3 space of both the pieces and make 1SC through both the pieces.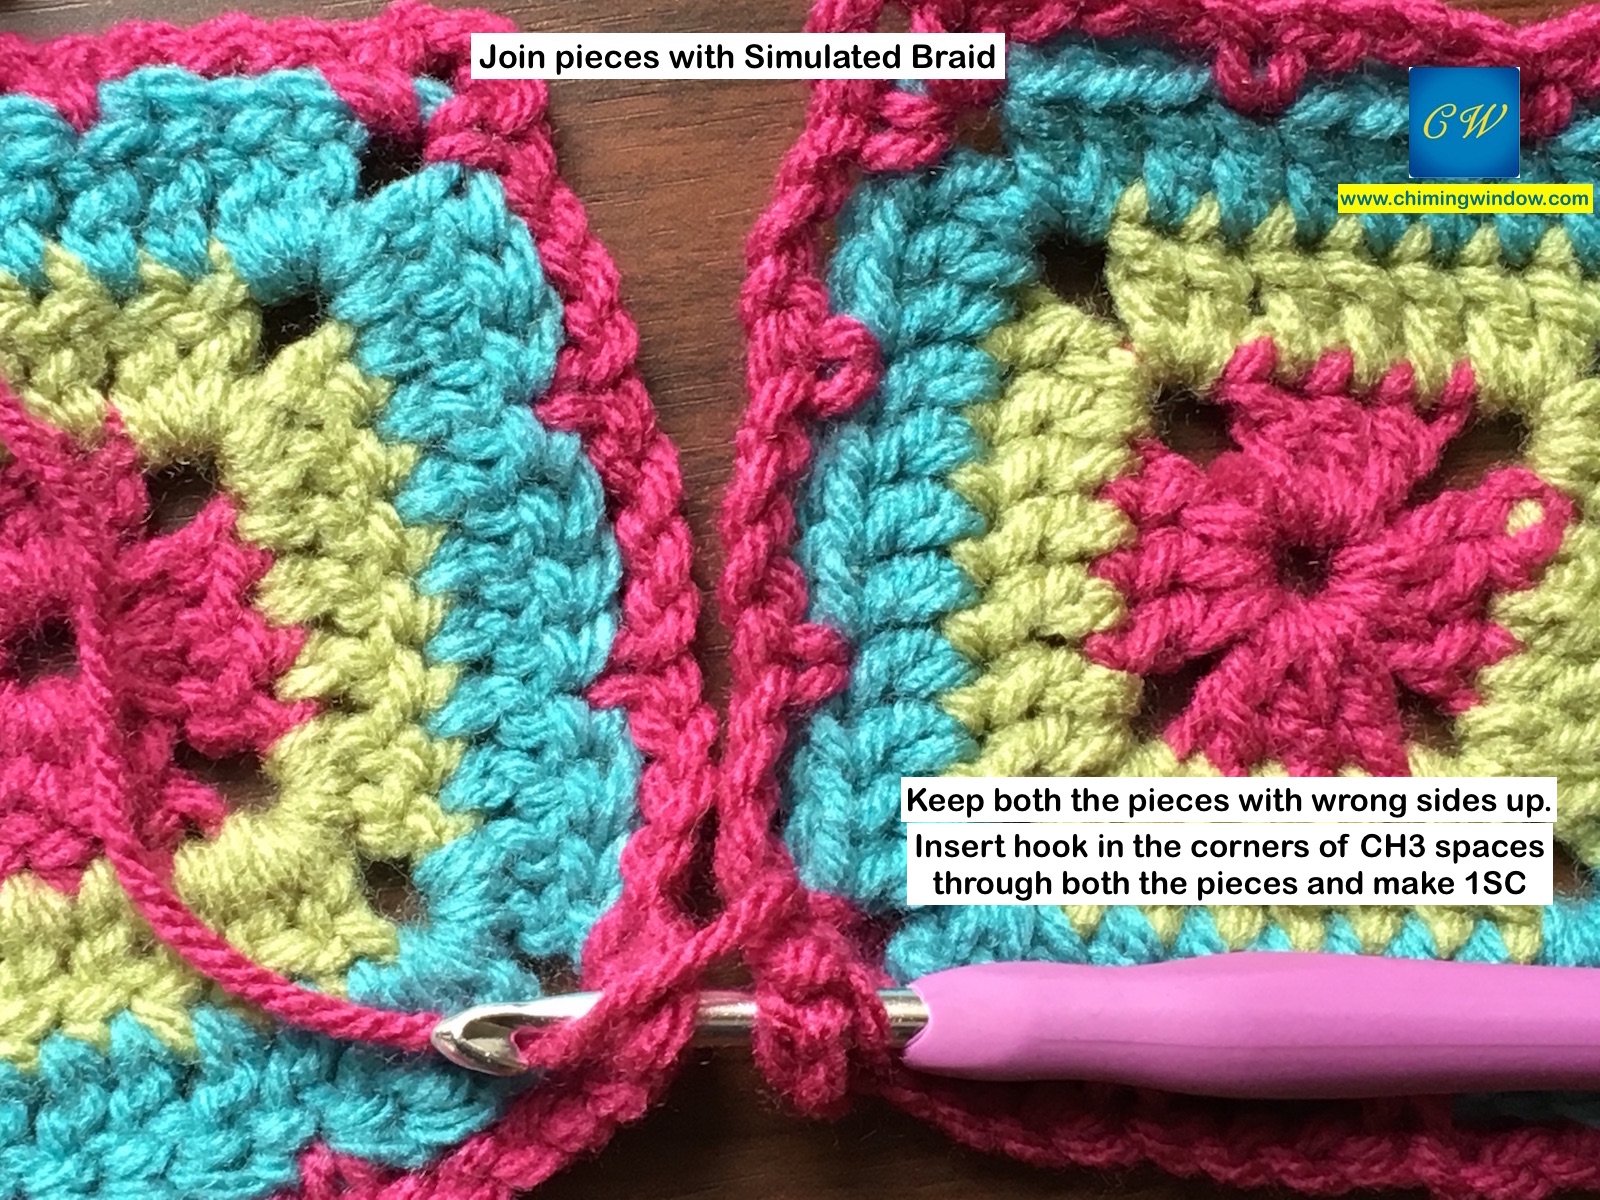
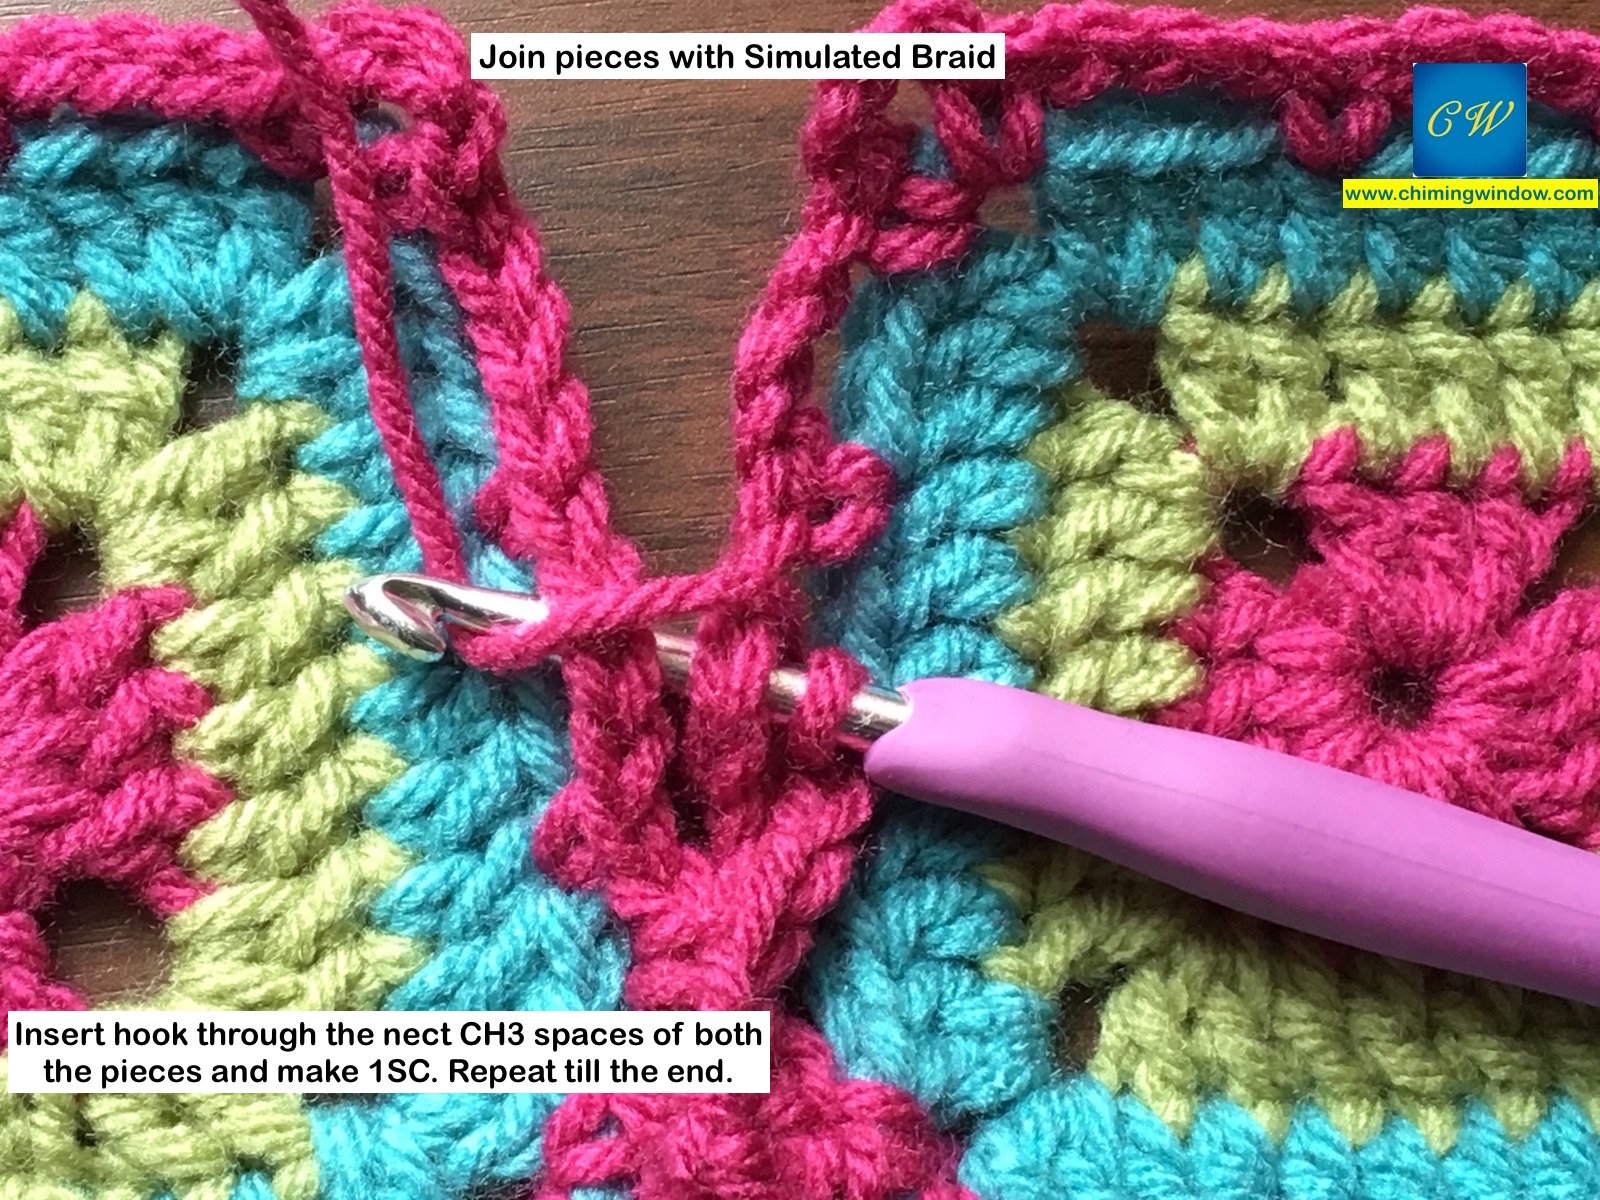
*CH3 and make 1SC through next CH3 spaces of both piece #1 and piece#2*. Repeat * * till the end.

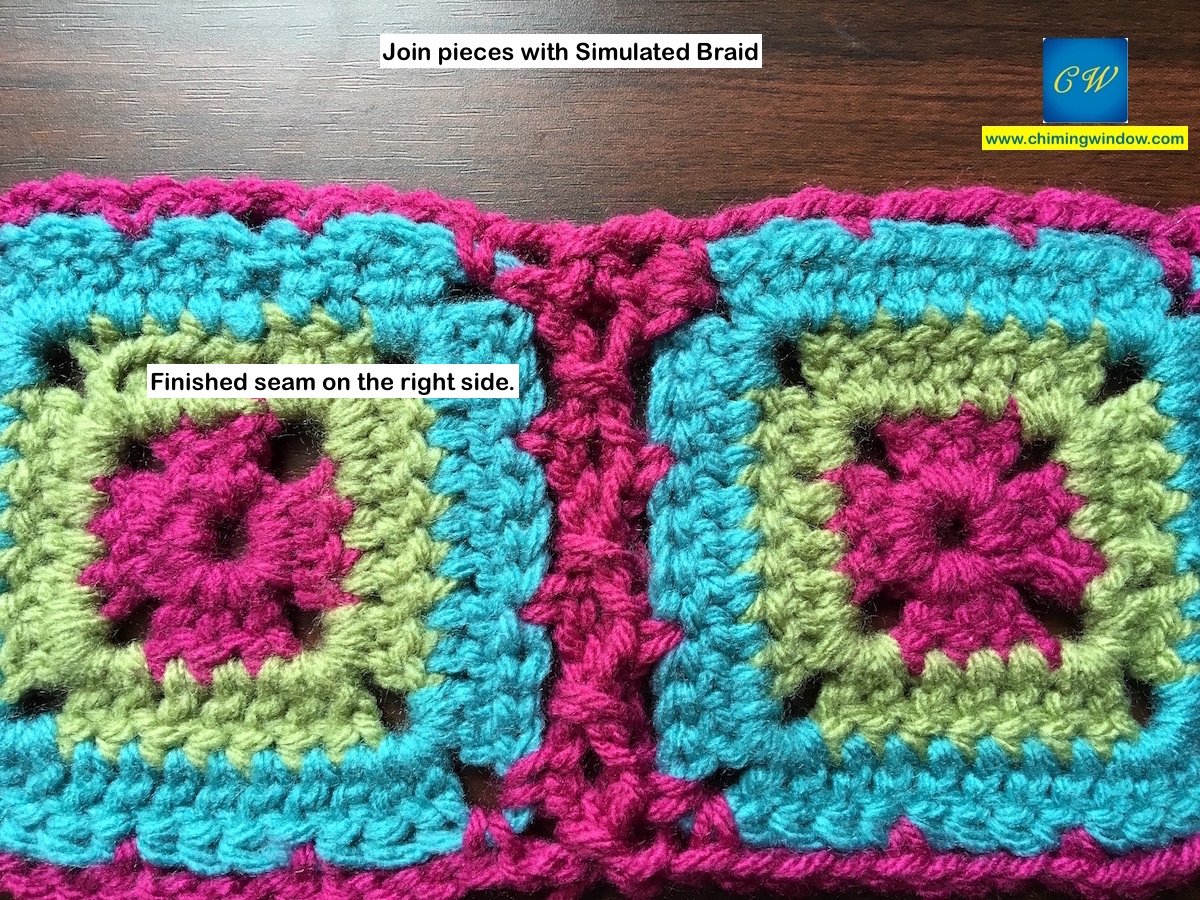
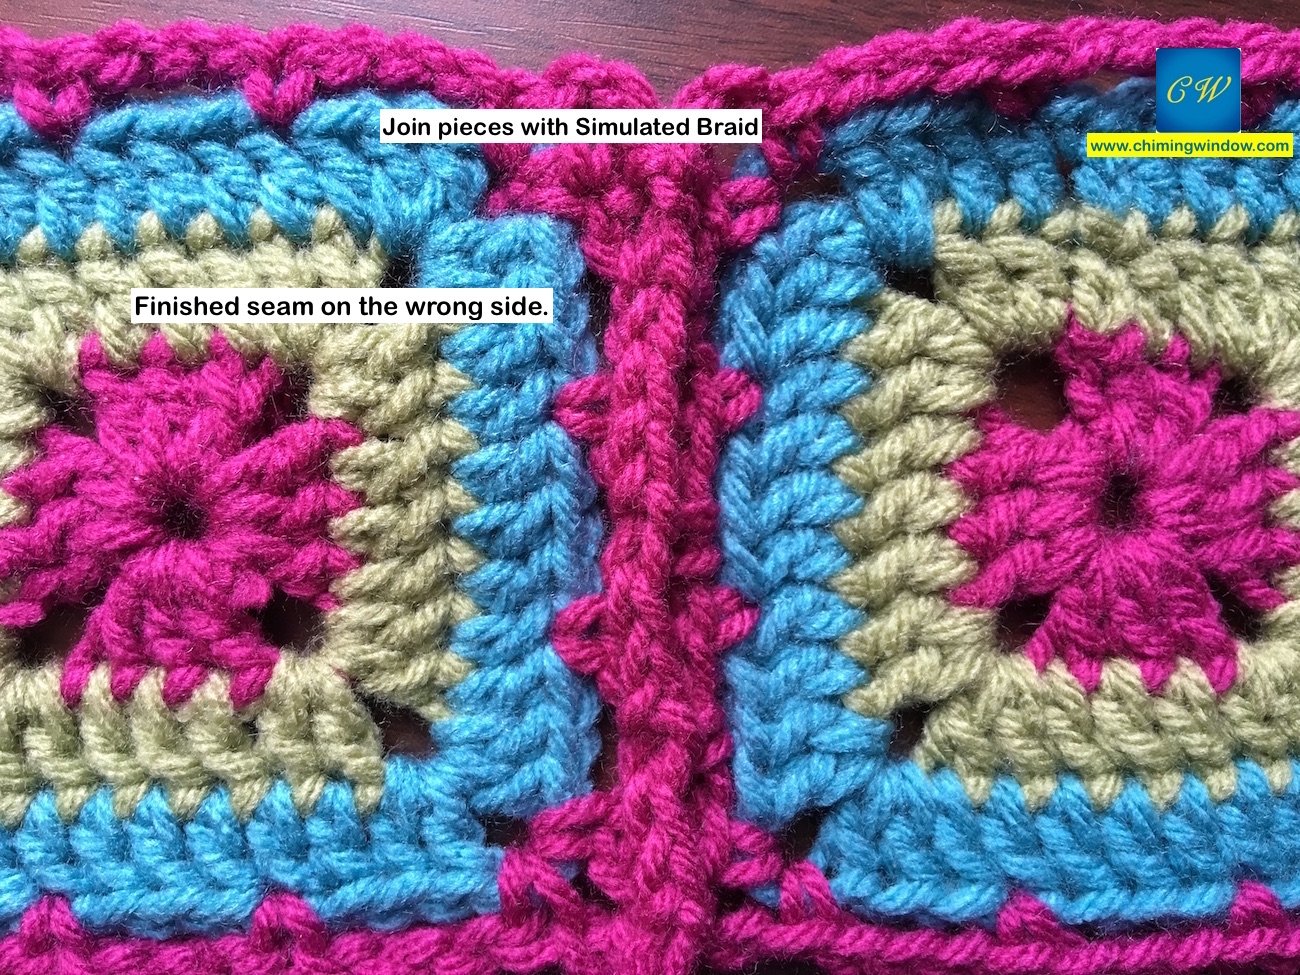
To join 3th and 4th piece finish round #1 all around the edges.
For more seams, click on the following links –
SEAMS WITH NEEDLE –
http://chimingwindow.net/whip-stitch-seam-seams1-crochet13/
http://chimingwindow.net/back-loop-seam-seams2-crochet14/
http://chimingwindow.net/back-stitch-seam-seams3-crochet15/
http://chimingwindow.net/chain-stitch-seam-seams4-crochet16/
http://chimingwindow.net/mattress-seam-seams5-crochet17/
http://chimingwindow.net/skip-stitch-seam-seams6-crochet18/
http://chimingwindow.net/woven-seam-seams7-crochet19/
SEAMS WITH HOOK –
http://chimingwindow.net/sl-st-seam-slip-stitch-seams8-crochet20/
http://chimingwindow.net/sc-seam-seams9-crochet21/
http://chimingwindow.net/sc-ch-seam-seams10-crochet22/
http://chimingwindow.net/alternating-sl-st-seams-11-crochet23/
http://chimingwindow.net/flat-zipper-seam-seams-12-crochet24/
http://chimingwindow.net/cable-stitch-seam-seams13-crochet25/



No Comments