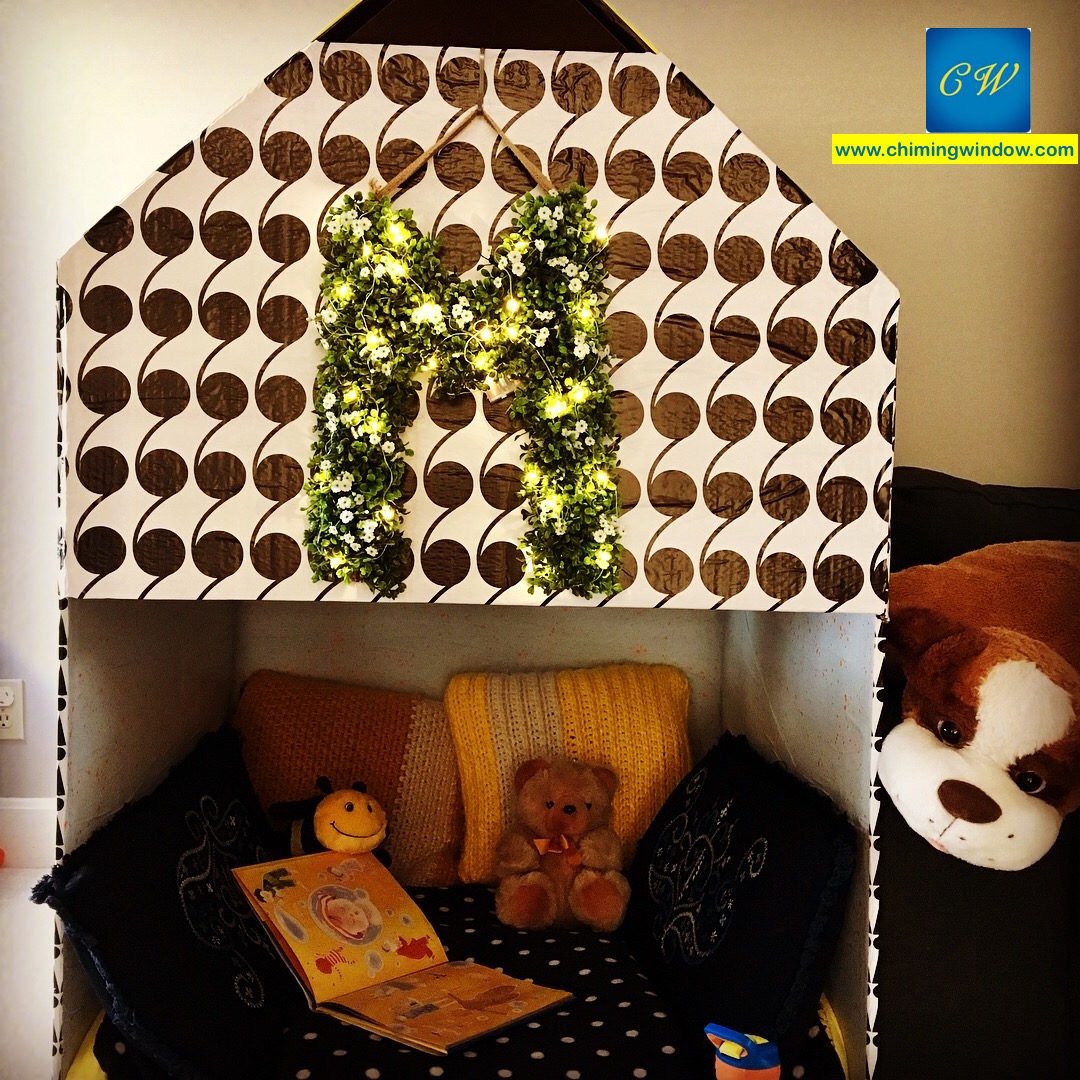
This project is extra special for me. I wanted to create a space for my (soon to be 3 year old) boy, where he could cozy up and enjoy playing on his own or read his favorite books.
Ever since the project took its basic shape, my little boy didn’t want to leave it. That didn’t give me much time to finish the project in one go. It took me 3 weekends to finish it completely.
But if its at all possible, it can very well be done in 6-8 hours. First of all my idea of providing various pretend play stuff to my little one comes from the idea of buying less and recycle more. In addition to this idea, i don’t want to compromise on the quality.
MATERIALS NEEDED –
- Carton – I used packaging carton of the couch we purchased sometime ago.
- Angle corners to strengthen the playhouse in the corners. These pieces were also part of packaging of couch. In the absence of these, you can add extra layers of cardboard.

- Hot glue gun
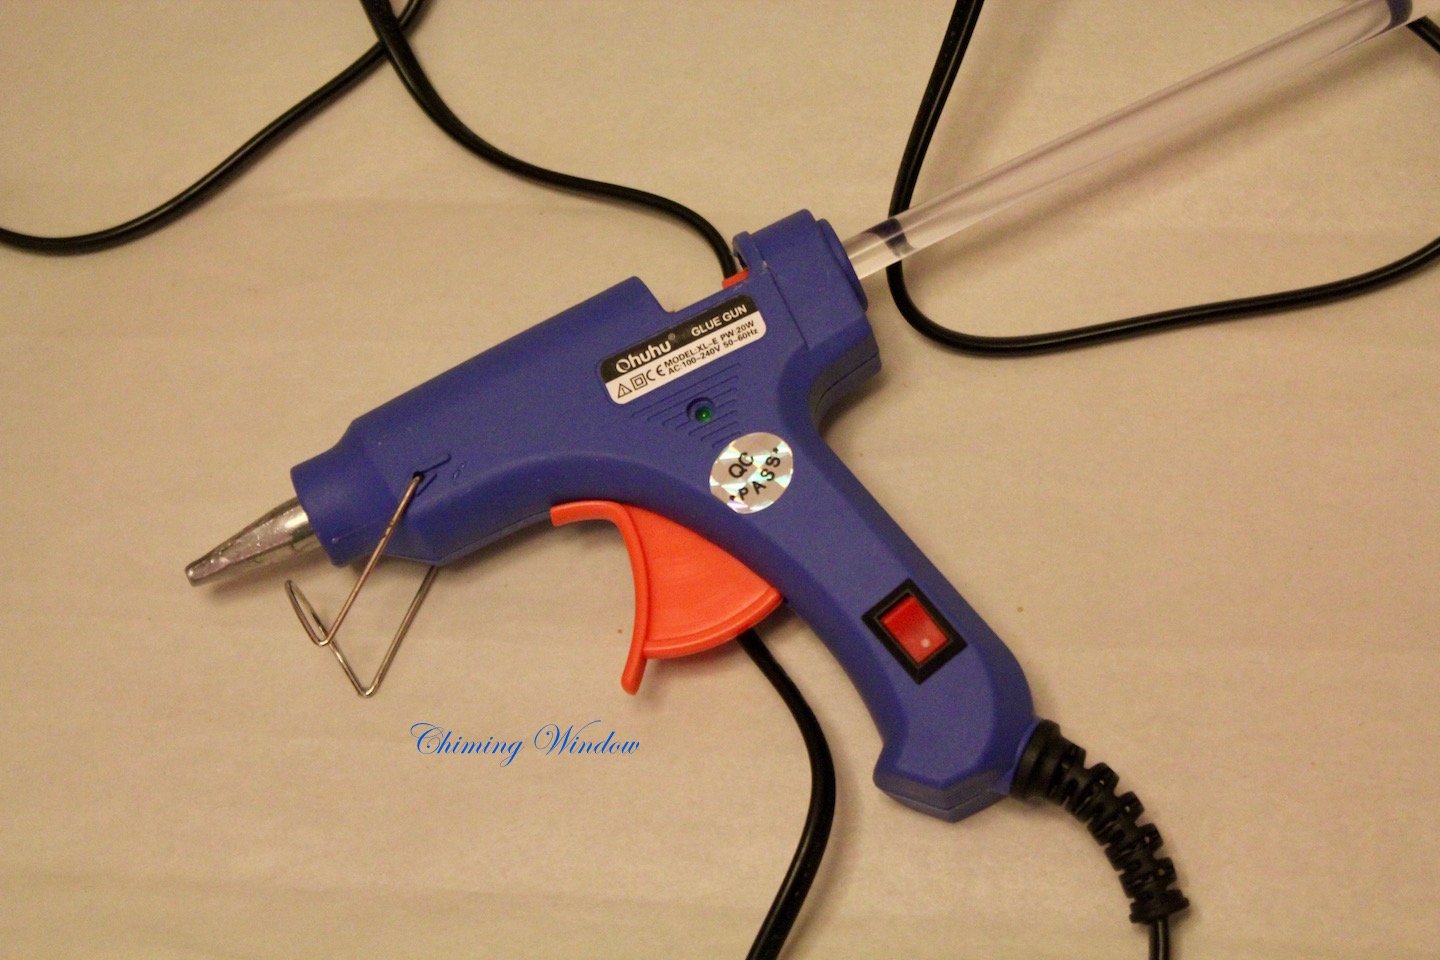
Hot glue gun
- Glue

- Duct tape

DUCK ORIGINAL 1.88IN X 55YD 3PK DUCT TAPE 8PKS/CS
- A pair of scissors

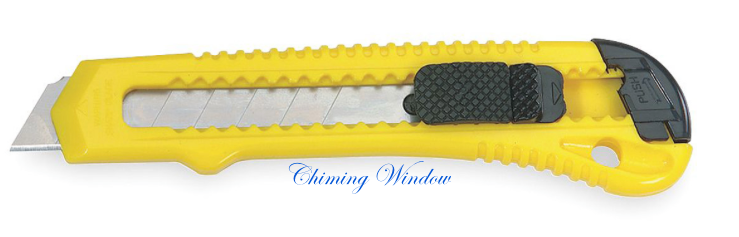
- Paper knife
- Measuring tape
- Wrapping paper roll – You can select your choice of prints and color. I got mine from Ikea a set of 3 coordinated prints. Each roll had approximately 10 feet length and 2.2 feet width.
- Battery operated lights
- Some decorative pieces to put up on inside walls. I used star garland and rice lights. Their own work of arts can be put up there.
STEPS –
OUTER STRUCTURE –
- I wanted to make a little taller playhouse. Therefore i used a bigger size carton. Carton size was 36″ x 36″. Top and bottom had 4 flaps on each side. I have cut one flap as marked in the below image.

- Add angle corners on all 4 corners to add extra support to the structure.


- 2 flaps on the top were joined to create the top inverted ‘V’ shape. Use duct tape and hot glue gun to hold the shape in place. The flap at the bottom will be folded up to add extra layer to the front wall. It is also longer than the height of the front wall, therefore it will partly cover the front of the ‘V’ shape roof.

- Back side flap on top will help in covering the back of ‘V’ shape roof.

- 3 sides of bottom flaps were opened out to create back and side walls.

- I used an extra layer of cardboard on the sides to strength the shape. As soon as the structure was up, my boy was so much in love with it that he started bringing his stuff in. he literally started hanging on the sunroof. I had to ensure that sides won’t collapse with his weight. This extra layer was added with the liberal use of hot glue.
WINDOWS –
- Make a paper stencil to mark sun roof and side windows and cut the pieces out with paper knife.


FINISHING OUTER SIDE WALLS –
Who you start covering with paper, start from outer side walls.
- To cover each side wall, the size of the paper should be 1.5 inches extra on all sides. The top edge will cross over the top edge of the side wall. Cover the edge in the front with the excess paper and fold it inside. Similarly cover the bottom edge and back.
- You can spread the glue in 2 parts, so that it doesn’t dry up before you are able to lay the paper over it. Make sure there are no air bubbles or wrinkles. As you start laying the paper, keep a check and push out bubbles and wrinkles simultaneously.


- Window area – While you will be covering outer walls or roof, windows will get covered with paper. To give it clean finish, sit inside the house and use paper knife to cut the window area in ‘X’ shape. Fold the cut pieces inside and stick with glue.

-
Front wall –
Since we have already folded the paper of the side walls over the front wall, aper for front wall will be cut in exact measurement on sides and excess measurement (1.5″) on top and bottom. Bottom and top edges will be finished with this excess paper. A cut in the excess paper on the joins will make it smooth to fold. Fold the center part inside the house and sides over the roof. Fold the bottom inside the house. Below image will be helpful in understanding this step better.

FINISHING ROOF –
Roof – Paper for roof will be cut in one piece from one end to other, with excess measurement in front and back and exact measurement on sides. Clip the excess paper in front at the marked points and fold the paper inside the house. The rest of the paper, fold it backward and cut it with paper knife. Because the paper on the front wall was folded over the roof, as a result raw edges are finished here. In this area, when u cut the excess paper, make sure the edge is matching with the edge of the roof and does’t cross it.


- Sun roof – To finish this window, follow the same steps as it was done for side windows.

- Back – Back will be absolutely flat. Cut the exact measurement on top and sides and excess (1.5″) at the bottom. Fold the excess at the bottom inside.
- Mock door – Once the house was finished, my little boy, sat outside, near the windows and pretended there was a door to knock. I had to make this mock door to give shape to his imagination.

INSIDE WALLS –
Paper – Although any color or pattern can be used inside, I preferred to use light color paper to make it look spacious. Paper was cut in the exact measurement of inside area. I started from one end, by overlapping the edge of the folded paper of outside wall and rolled out the paper till the other end. Entire side wall, back wall and other side wall were covered in one flow. In this process, glue was spread out in parts, to avoid any mistakes in laying the paper. One layer was used at the bottom visible part, end to end. The rest of the inside area, top part of the walls and ceiling were covered in the pieces of exact measurements.

In addition to the battery operated lights i added one star garland on the back wall. This is optional. You can use stuff of your choice.
As if all the drumming, reading and other games were not sufficient, he prefers to park his bike inside.
3 Comments
furtdsolinopv
October 29, 2018 at 11:37 PMExcellent web site. Lots of helpful info here. I?¦m sending it to a few friends ans also sharing in delicious. And obviously, thank you in your sweat!
Chiming Window
October 31, 2018 at 2:07 PMThank you 🙂
minecraft
October 7, 2018 at 1:58 AMIt’s difficult to find knowledgeable people in this particular subject, however, you sound like you know
what you’re talking about! Thanks