DC 2 TOGETHER SEAM – (With Hook) –
DC 2 together seam is made with DC stitches. It adds space in between the 2 pieces by forming a ridge. Usage of a contrast color in joining the pieces will add to the character of the design. It is done from the right side of the pieces.
This seam is suitable for the granny squares or other pieces which are made from center to outwards. Pcs with he stitches all around helps in maintaining the consistency and balance in the design.
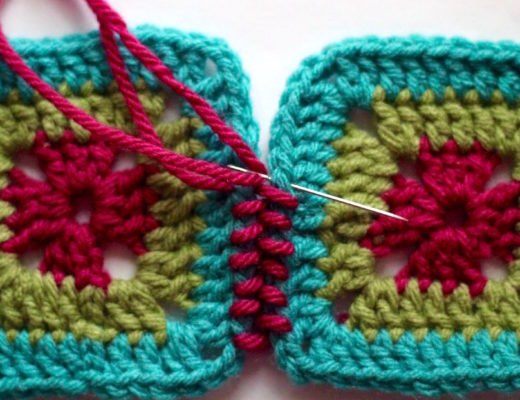
For this seam, instead of joining the yarn with slip stitch, yarn is joined in the corner of piece#1 with DC. To start working on this seam, make the slip knot, yarn over and insert in the corner and pull the yarn. Refer the below image.

* You will have 3 loops on the hook. Yarn over and pull it through 2 loops of the hook. There will be 2 loops on the hook.
Yarn over and insert the hook in the corner space of piece#2. Pull the loop. There will be 4 loops on the hook. Yarn over, pull it through 2 loops of the hook. There will be 3 loops on the hook. Finish the loops as DC. CH1.*
Refer the below images for stepwise directions.


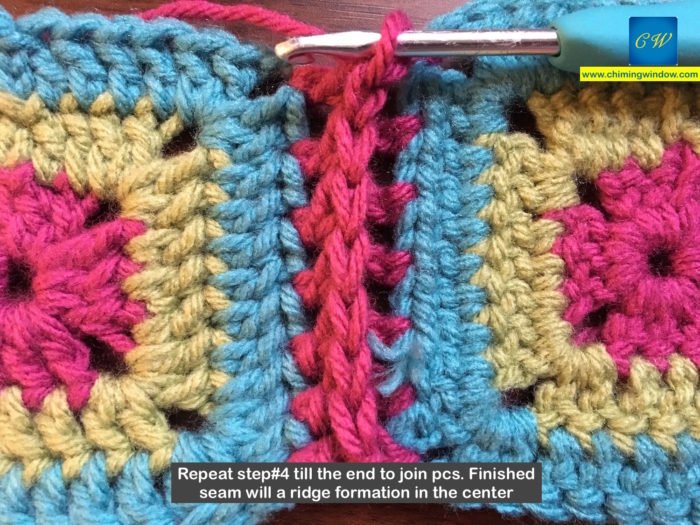
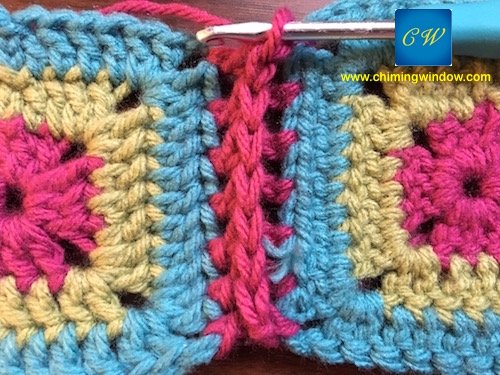
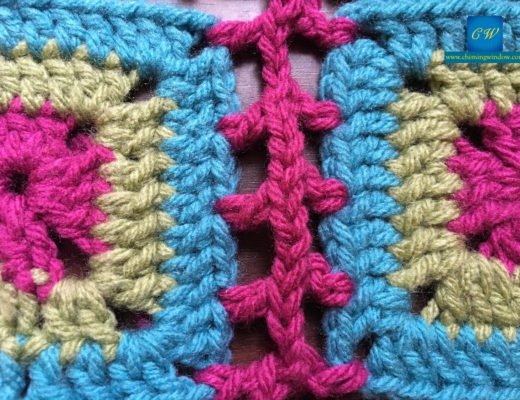
Above image shows the first finished stitch and the first appearance of the ridge formation between the 2 pieces.
Yarn over, skip the next stitch on piece#1 and insert the hook in the next stitch, pull the loop and repeat * * till the end.
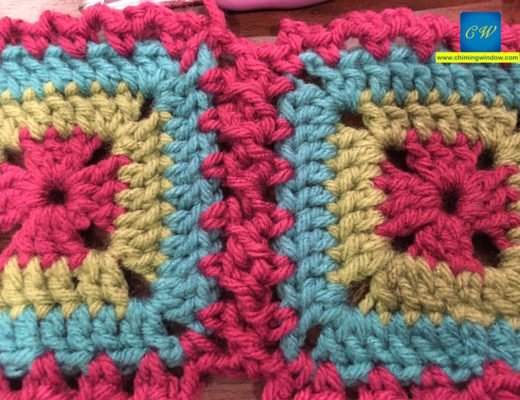
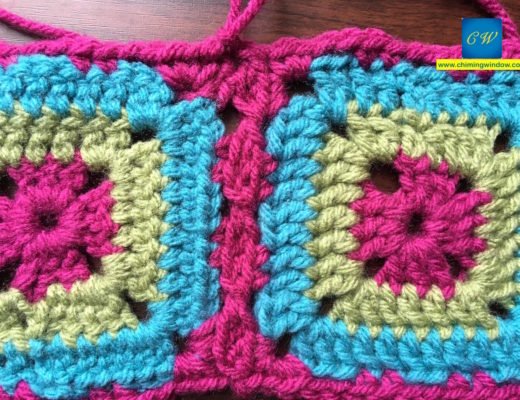
Refer the below image for the final appearance of the seam. The ridge in-between adds the character to the project.
For more seams, click on the following links –
SEAMS WITH NEEDLE –
https://chimingwindow.net/whip-stitch-seam-seams1-crochet13/
https://chimingwindow.net/back-loop-seam-seams2-crochet14/
https://chimingwindow.net/back-stitch-seam-seams3-crochet15/
https://chimingwindow.net/chain-stitch-seam-seams4-crochet16/
https://chimingwindow.net/mattress-seam-seams5-crochet17/
https://chimingwindow.net/skip-stitch-seam-seams6-crochet18/
https://chimingwindow.net/woven-seam-seams7-crochet19/
SEAMS WITH HOOK –
https://chimingwindow.net/sl-st-seam-slip-stitch-seams8-crochet20/
https://chimingwindow.net/sc-seam-seams9-crochet21/
https://chimingwindow.net/sc-ch-seam-seams10-crochet22/
https://chimingwindow.net/alternating-sl-st-seams-11-crochet23/
https://chimingwindow.net/flat-zipper-seam-seams-12-crochet24/
https://chimingwindow.net/cable-stitch-seam-seams13-crochet25/
https://chimingwindow.net/join-along-seam-seams14-crochet26/
https://chimingwindow.net/simulated-braid-seam-seams15-crochet27/
https://chimingwindow.net/dc-braid-seam-seams16-crochet28/
https://chimingwindow.net/flat-braid-seam-seams17-crochet29/
https://chimingwindow.net/tight-braid-seam-seams18-crochet30/
https://chimingwindow.net/scallops-seam-seams19-crochet31/
https://chimingwindow.net/lace-seam-seams20-crochet32/
https://chimingwindow.net/continuous-join-cluster-seams21-crochet33/



2 Comments
Rosario Beedy
October 23, 2018 at 6:12 AMF*ckin’ tremendous things here. I’m very glad to see your post. Thanks a lot and i’m looking forward to contact you. Will you kindly drop me a e-mail?
Chiming Window
October 23, 2018 at 2:43 PMHi, thanks !
You can write to me on chimingwindow@gmail.com